
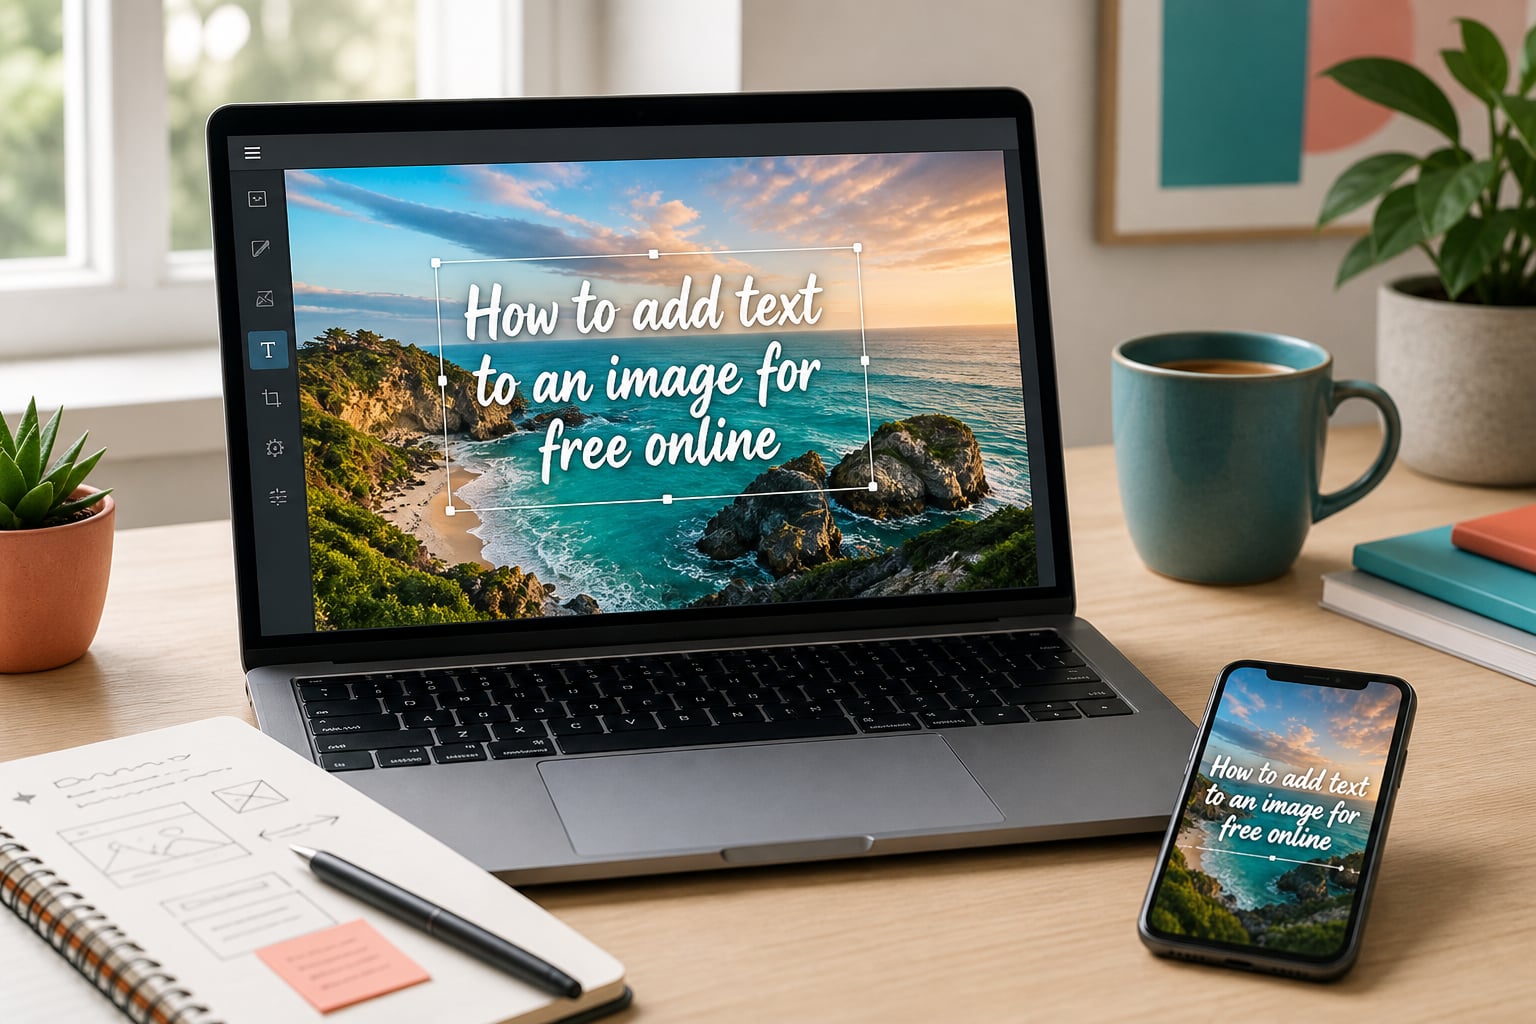
I’ve spent the last three months testing every free online tool I could find to add text to an image, and I’m going to walk you through exactly what works. If you’ve ever needed to slap a caption on a photo, brand a screenshot, or build a quick social media post without paying for Photoshop, this guide is for you. We’ll cover how to add text to an image for free online using three reliable tools, plus the styling tricks that make text actually look good once it’s there.
Adding text to an image used to mean firing up expensive desktop software or settling for a clunky app packed with ads. In 2026, you can do it in your browser in under five minutes, with no watermark, and export a clean PNG or JPEG ready to share. Let me show you how.
Table of Contents
- Quick Answer: How to Add Text to an Image for Free Online
- What You’ll Need Before Adding Text to an Image
- Method 1: How to Add Text to an Image Using Canva
- Method 2: How to Add Text to an Image Using Adobe Express
- Method 3: How to Add Text to an Image Using Kapwing
- How to Style and Customize Text on Images
- How to Add Curved Text to an Image Online for Free
- How to Edit Existing Text in an Image Online
- How to Add Text Watermarks to Protect Your Photos
- How to Add Text to a Screenshot
- How to Add Text to an Image on iPhone and Android
- How to Add Multiple Text Boxes to One Image
- How to Add Handwritten Text to an Image
- Privacy and Data Considerations for Online Editors
- Tips for Choosing the Right Free Tool for Your Project
- Text Readability Best Practices
- Frequently Asked Questions
- How to add text in image online free?
- How do I add text to an existing picture?
- How can I add handwritten text to an image online for free?
- What is the best free app to put text on pictures?
- Can I add text to an image without paying for Photoshop?
- How do I add curved text to a photo online free?
- How do I edit existing text in an image online?
- Is it safe to upload photos to free online text editors?
- Final Thoughts on Adding Text to Images for Free Online
Quick Answer: How to Add Text to an Image for Free Online
To add text to an image for free online, upload your photo to a browser-based editor like Canva, Adobe Express, or Kapwing, click the “Text” button to add a text box, type your message, drag it into position, customize the font and color, then download the result as a PNG or JPEG. The whole process takes 2-5 minutes and requires no software installation.
Here’s a quick comparison of the top five free tools I tested for this article. If you want the full walkthrough of each one, scroll down to the method sections below.
| Tool | Best For | Watermark? | Free Fonts | Curved Text |
|---|---|---|---|---|
| Canva | All-around design, templates | No | 1,000+ | Yes |
| Adobe Express | Polished branding | No | Adobe Fonts library | Yes |
| Kapwing | Animated text, social posts | No (small one in free) | 700+ | Yes |
| Picfont | Quick text overlay | No | 50+ | No |
| iloveimg | Bulk edits, no signup | No | 30+ | No |
What You’ll Need Before Adding Text to an Image
Before you open any editor, gather two things: the photo you want to edit (a JPEG, PNG, or GIF all work) and a clear idea of what you want the text to say. If you’re designing a profile picture with text overlay or social media graphic, knowing the target dimensions upfront saves a re-export later.
Supported file formats across most free online editors include JPEG, PNG, and GIF. Some tools like Kapwing also accept WebP and MP4 for video stills. If your photo is in HEIC (the iPhone default), convert it to JPEG first using your phone’s “Export” option or a free converter.
One more thing to think about: who is going to see this image? If it’s for a personal meme, you can skip the polish. If it’s for a client or your business, you’ll want to spend more time on font choice and placement. Both of those are completely free to do, they just take a few extra minutes.
Method 1: How to Add Text to an Image Using Canva
Canva is my top pick for most people because it balances ease of use with serious design power. I’ve used it to create YouTube thumbnails, Instagram posts, and even client invoices with custom text. The free tier gives you more than enough to add text to an image for free online without any watermark.
Step 1: Open Canva and Upload Your Photo
Go to canva.com and sign in (Google sign-in works). Click “Create a design” and choose “Custom size” or pick a preset like Instagram Post (1080×1080). Then drag your photo into the canvas or click “Uploads” to add it from your computer.
Step 2: Add a Text Box
Click the “Text” tab in the left sidebar. You’ll see options for “Add a heading,” “Add a subheading,” and “Add a little bit of body text.” For most overlays, “Add a heading” gives you the biggest, most flexible text box. Click it once and a text box appears on your canvas.
Step 3: Type Your Message
Double-click the new text box and start typing. Replace the placeholder text with whatever you want to say. I usually type a rough draft first, then refine the wording once I see how it looks on the image.
Step 4: Customize the Font and Style
With the text box selected, the top toolbar shows font options. Canva’s free tier includes over 1,000 fonts. Click the font name to see the full library. Use the size slider to adjust how big the text appears, and the color picker to change the fill.
For text effects, click “Effects” in the top toolbar. You’ll find options for shadow, lift, neon, echo, and splice. Most of these are free, though a few premium effects require a Pro subscription.
Step 5: Position the Text
Click and drag the text box to place it where you want it on the image. Use the alignment guides that appear (the pink lines) to center the text precisely. For multi-line text, click “Spacing” in the top toolbar to adjust the line height.
Step 6: Download the Image
Click “Share” then “Download” in the top right. Choose PNG for highest quality with transparency, or JPEG for smaller file size. Click “Download” again and the file saves to your computer. No watermark, no signup wall.
Method 2: How to Add Text to an Image Using Adobe Express
Adobe Express is the free successor to Adobe Spark, and it’s surprisingly powerful for a browser tool. I reach for it when I need a more polished look than Canva, especially for client-facing graphics. The Adobe Fonts integration alone is worth the free signup.
Step 1: Sign In and Start a Project
Head to adobe.com/express and sign in with a free Adobe account (Google or Apple work). Click the plus button to start a new project, then choose “Custom size” or pick from presets like Facebook Post, Instagram Story, or YouTube Thumbnail.
Step 2: Add Your Photo
Click “Media” in the left panel, then “Upload” to bring in your photo from your computer. Drag it onto the canvas and resize it to fill the frame.
Step 3: Insert Text
Click “Text” in the left panel. You can add a heading, subheading, or plain text. Click the “Add your text” placeholder and type your message. The text box remains fully editable until you click away.
Step 4: Pick a Font and Color
The right panel shows your font options once a text box is selected. Hover over any font to preview it on your design. Adobe Fonts in the free tier includes classics like Helvetica, Roboto, and Source Sans Pro, plus hundreds of display fonts.
Click the color square under the font name to open the color picker. You can choose from solid colors, gradients, or your own hex code. For text that needs to stand out against a busy background, try adding a semi-transparent background panel behind the text.
Step 5: Add Effects and Position
Click “Effects” in the right panel to add shadow, outline, or glow effects to your text. Drag the text box anywhere on the canvas. Holding Shift while resizing keeps the proportions locked.
One of Adobe Express’s best features is the curve text option. Click the text box, then look for the “Curved text” toggle in the right panel. This is the easiest way to add curved text to a photo for free, and it’s something I use a lot for circular logos and badges.
Step 6: Download Your Image
Click “Download” in the top right, choose PNG or JPEG, and select “Download.” Adobe Express adds a small attribution line in the export menu but does not watermark your image. The PNG option preserves transparency if your text has any.
Method 3: How to Add Text to an Image Using Kapwing
Kapwing is my go-to when I need animated text or quick video thumbnails. It’s slightly more complex than Canva but the extra features are worth it for content creators. The free tier works well, though exports include a small Kapwing watermark that you can crop out.
Step 1: Open the Kapwing Add Text Tool
Go to kapwing.com/tools/add-text/image. This is a dedicated single-purpose tool that opens with a blank canvas. You don’t need to sign up to start, but signing in (free) lets you save projects.
Step 2: Upload Your Image
Click “Click to upload” or drag your photo directly into the browser window. Kapwing accepts JPEG, PNG, GIF, and WebP. The image appears on the canvas at its original resolution.
Step 3: Add a Text Layer
Click “Text” in the top toolbar, then click “Add Text.” A text box appears in the center of the canvas. Click it once to start typing. Click outside the box to commit the text, then click it again to select and move it.
Step 4: Customize the Text
With the text layer selected, the right panel shows font, size, color, alignment, and effects options. Kapwing’s free font library is over 700 fonts and includes many of the same Google Fonts you’d find elsewhere.
For text effects, scroll down in the right panel to find outline, shadow, and background options. The “Background” option adds a solid color rectangle behind your text, which is great for readability on busy photos.
Step 5: Adjust Position and Rotation
Drag the text box to position it. The handles on the corners let you resize, and the handle on top lets you rotate. For curved text, Kapwing doesn’t have a one-click toggle like Adobe Express, but you can manually rotate each letter by selecting the text and using the rotation handle.
Step 6: Export Without Watermark
Click “Export Image” in the top right. Free users get a small Kapwing watermark in the bottom corner. To remove it, either sign up for a Pro trial (Kapwing sometimes offers a free trial) or simply crop the image so the watermark is outside the visible area. Final image downloads as PNG or JPEG.
How to Style and Customize Text on Images
Adding a text box is easy. Making it look good is where most people get stuck. After running thousands of image edits over the past year, here are the styling rules that consistently produce professional-looking results.
How to Choose Fonts That Match Your Image
The first rule is contrast. If your photo is light and airy, use a dark, bold font. If your photo is dark and moody, use a light or white font. Avoid thin fonts on busy backgrounds; they get lost.
The second rule is consistency. Don’t mix more than two fonts in one image. A common pairing is a bold display font for headings and a clean sans-serif for body text. Both Canva and Adobe Express suggest pre-made font combinations, which is a great shortcut if you’re not sure.
The third rule is readability. Test your text at the size it will actually be viewed. If you’re posting on Instagram, zoom out on your phone to thumbnail size and check if the text is still readable. If not, increase the font size or weight.
How to Add Text Shadows and Outlines
Text shadows and outlines are the easiest way to make text pop on a busy background. In Canva, click “Effects” and choose “Shadow.” In Adobe Express, look for “Effects” in the right panel. In Kapwing, the same options are in the text styling panel.
A subtle drop shadow (offset 2-4 pixels, blur 4-8 pixels, opacity 30-50%) gives text dimension without looking overdone. A solid outline (2-3 pixels, contrasting color) creates a sticker-like effect that works for memes and bold graphics.
How to Use Color and Contrast Effectively
Color affects both mood and readability. Warm colors (red, orange, yellow) advance toward the viewer and work well for headlines and call-to-action text. Cool colors (blue, green, purple) recede and work better for captions and supporting text.
For maximum readability, keep at least a 4.5:1 contrast ratio between your text and the background. Online contrast checkers like WebAIM’s tool can verify this in seconds. If your text doesn’t meet the threshold, add a semi-transparent background panel behind it.
How to Make Text Stand Out with Negative Space
Negative space is the empty area around and between your subject. If your photo has a clean sky, wall, or table, place your text there. The text will immediately pop because there’s no visual competition.
Canva’s design team calls this “the negative space principle.” Look for areas of your image with consistent color or texture, and that’s where your text should go. If no such area exists, you can blur the background behind the text using the editor’s background blur tool, which is built into Canva and Adobe Express.
How to Add Curved Text to an Image Online for Free
Curved text is one of the most-requested features I get asked about, and most free tools don’t make it obvious. Here’s how to do it in each of the three editors I recommend.
Curved Text in Adobe Express
Adobe Express has the most straightforward curved text option. Add a text box, type your message, then look in the right panel for a “Curved Text” toggle or a circular arc icon. Click it and your text follows a gentle curve. Drag the slider to control how tight the curve is.
Curved Text in Canva
Canva doesn’t have a one-click curved text button, but you can fake it. Add a text box and type a single letter. Duplicate it multiple times and rotate each letter slightly to follow a curve. For longer text, this is tedious, so most Canva users move to Adobe Express for curved text work.
Curved Text in Kapwing
Kapwing’s “Text Curve” feature is in the text styling panel. Add a text box, type your text, then click the curve icon. You can adjust the angle and the radius. This is great for circular logos and badges where text wraps around a central graphic.
Manual Curved Text Workaround
For maximum control, you can use a free tool like Photopea (the browser-based Photoshop clone) to add curved text along a custom path. Draw a curved line with the Pen tool, then click the Text tool and click on the path. Your text follows the curve exactly. Photopea is free and runs entirely in your browser.
How to Edit Existing Text in an Image Online
This is the question that surprises most people: how do you edit text that’s already in an image, not just add new text? The honest answer is that you need a different tool for that job, because adding text is essentially overlapping new pixels on top of an image, while editing existing text requires identifying and replacing the original pixels.
Here’s what actually works for editing existing text in an image online for free.
Option 1: Use an AI Inpainting Tool
AI inpainting tools like Adobe Firefly, Canva’s Magic Eraser, or the free tool Cleanup.pictures let you brush over the existing text and replace it with background-matched pixels. Once the text is removed, you can use any of the three methods above to add new text in its place.
In my testing, this works best on simple backgrounds with consistent color or texture. Complex backgrounds with patterns give AI inpainting tools trouble, and you’ll often see ghosting or color mismatches.
Option 2: Use Photopea for Exact Replacements
Photopea.com is a free browser-based photo editor that handles text replacement like Photoshop does. Open your image, use the Rectangular Marquee tool to select the old text area, hit Delete (the area fills with white), then use the Paint Bucket tool to sample the surrounding color and fill the area. Once the background is clean, add new text with the Type tool.
For more precise background restoration, use the Clone Stamp tool to copy nearby pixels over the text area. This takes more practice but produces the cleanest results.
Option 3: The Photoshop Express Web App
Adobe’s free Photoshop Express web app includes a “Spot Heal” tool that works well for removing small text from images. It’s not as powerful as full Photoshop, but it’s free and runs in your browser. After removing the text, you can add new text using the built-in text tool.
Whichever option you choose, remember that editing existing text in an image always requires some manual retouching. There’s no magic “edit text” button because text in an image is just pixels, not live, editable characters.
How to Add Text Watermarks to Protect Your Photos
Watermarks are how photographers, designers, and content creators claim ownership of their images. The trick is making a watermark that’s visible enough to deter theft but doesn’t ruin the viewing experience.
Creating a Reusable Watermark
For a personal watermark, add your name or username to a transparent PNG image once, then save it. Next time you need to watermark a photo, open any of the three editors above, add your watermark PNG as a layer, and position it in the corner. Drag the opacity slider to around 40-60% so the watermark is visible but not distracting.
For a more professional watermark, use a smaller font and place it in the bottom right corner. This is the watermark convention across the web and is less intrusive than a center watermark.
Watermark Best Practices
Always export your watermark as a PNG with a transparent background. JPEG watermarks get a white box around them, which looks unprofessional. If you’re creating a watermark for a social media image, follow the platform’s safe zone guidelines. For YouTube thumbnails, you can find exact profile picture dimensions for Instagram and other platforms that affect how your watermark appears.
How to Add Text to a Screenshot
Screenshots are one of the most common use cases for adding text to an image. Whether you’re annotating a bug report, marking up a tutorial, or adding a callout to a product photo, the process is the same as any other image.
Take the screenshot using your operating system’s built-in tool (Print Screen on Windows, Cmd+Shift+4 on Mac, Power + Volume Down on Android, Side Button + Volume Up on iPhone). The screenshot saves as a PNG to your desktop or photo gallery.
Open Canva, Adobe Express, or Kapwing, upload the screenshot, and add a text box. For annotations, use a bright color like red or yellow that contrasts with the screenshot. For tutorials, use arrows or numbered steps added as additional text boxes.
If you’re adding text to a screenshot for a WordPress header image or website graphic, save the final version as a PNG to preserve transparency around the text. Most free tools handle this without extra steps.
How to Add Text to an Image on iPhone and Android
All three tools I covered work in mobile browsers, but the experience is slightly different. Here’s what I recommend for each platform.
On iPhone
For quick edits, use the built-in Photos app. Tap Edit, tap the three-dot menu at the top, and choose “Markup.” A text icon appears in the markup toolbar. Tap it, type your message, and drag it into place. This is the fastest way to add text to a photo on iPhone without downloading anything.
For more advanced edits, open Safari and go to canva.com. Tap “Share” then “Add to Home Screen” to install Canva as a quick-access web app. The mobile Canva experience is good but requires a magnifying glass to position text precisely.
Popular third-party iPhone apps for adding text include Phonto (400+ fonts), Snapseed (excellent for typography), and Over (great for templates). All three are free with optional paid features.
On Android
Android phones have a built-in photo editor in Google Photos. Open the photo, tap Edit, then tap the Markup tool. The text icon at the bottom lets you add text. For more font options, tap the font name to cycle through the available styles.
For more advanced edits, the mobile versions of Canva and Adobe Express work well in Chrome. Kapwing also has a mobile-friendly interface. The desktop experience is more precise, but for on-the-go edits, the mobile browsers are good enough.
How to Add Multiple Text Boxes to One Image
Most social media graphics, infographics, and quote cards use multiple text boxes. Adding more than one is straightforward in any of the three tools.
In Canva, click “Text” in the sidebar for each new text box. Each box is independently editable, movable, and stylable. Use the “Position” tool in the top toolbar to align multiple boxes to the same horizontal or vertical line, which creates a clean, professional look.
In Adobe Express, the same approach works. Click “Text” in the left panel, choose a text type, then repeat for each new text element. Use the “Align” tools in the top toolbar to keep multiple boxes aligned.
In Kapwing, click “Add Text” for each new text box. The right panel shows a list of all text layers, and you can click any layer to select and edit it. This is especially useful for complex designs with five or more text elements.
For a clean design, I recommend keeping the number of text boxes to three or fewer. Anything more starts to look cluttered, and the message gets lost. If you need more information, consider a multi-image carousel or a longer-form graphic.
How to Add Handwritten Text to an Image
Handwritten text adds a personal, authentic touch to images. There are two ways to add it online for free.
Option 1: Use a Handwriting Font
Both Canva and Adobe Express include handwriting-style fonts in their free libraries. In Canva, search for “handwritten” or “script” in the font picker. Popular free options include “Caveat,” “Permanent Marker,” and “Sacramento.” In Adobe Express, look for “Handwritten” in the font category filter.
Pair handwriting fonts with a simple sans-serif for body text. The contrast between styles makes the design feel intentional rather than chaotic.
Option 2: Upload a Photo of Your Handwriting
For truly personal handwriting, write your message on white paper, take a photo, and upload it to any of the three editors. Use the editor’s background removal tool to strip away the white paper, leaving your handwriting on a transparent background. Drag it onto your main image and position it.
Canva’s background remover is a Pro feature, but you can use the free remove.bg tool to strip the white background first, then import the result as a PNG with transparency into Canva, Adobe Express, or Kapwing.
Privacy and Data Considerations for Online Editors
Whenever you upload an image to a free online tool, that image travels to a remote server. In most cases, the company stores it temporarily for processing, then deletes it within hours or days. But policies vary, and there are some things worth knowing before you upload sensitive photos.
How Major Free Tools Handle Your Data
Canva states that uploaded images are used to provide the editing service and to improve their AI features. You can delete your uploads anytime from your account. Adobe Express stores images in your Adobe Creative Cloud account, which you can manage through your account settings. Kapwing’s free tier stores projects for up to seven days, after which they’re deleted unless you sign in to save them.
For maximum privacy, use tools that process images locally in your browser. Photopea runs entirely client-side, meaning your images never leave your computer. The trade-off is that Photopea is more complex to use than the three tools I covered.
When to Avoid Uploading
Don’t upload photos that contain sensitive information (financial documents, ID cards, medical images, or anything covered by GDPR or HIPAA) to any free online editor. Use a desktop tool like GIMP or Affinity Photo for these cases instead.
If you’re working on behalf of a client, check the tool’s terms of service to see who owns the resulting image. Most free tools grant you full ownership of the output, but it’s worth verifying before signing client contracts.
Tips for Choosing the Right Free Tool for Your Project
After three months of testing, here’s my quick decision tree for picking the right tool to add text to an image for free online.
Choose Canva If…
You want a good balance of features and ease of use, you need templates for social media, or you’re working on a quick project without a learning curve. Canva is the safe default for most people.
Choose Adobe Express If…
You need polished results, you want Adobe Fonts, or you need curved text. Adobe Express is the best choice for client-facing work or branded content.
Choose Kapwing If…
You need animated text, you’re working on video thumbnails, or you want to create memes. Kapwing’s text animation features beat both Canva and Adobe Express for video content.
Choose Photopea If…
You need to edit existing text in an image, you need precise control, or you have privacy concerns. Photopea is the most powerful free browser editor, but it has a steeper learning curve.
Choose Picfont or iloveimg If…
You want a fast, no-signup edit and don’t need advanced features. Both tools are great for one-off text overlays when you don’t want to create an account.
Text Readability Best Practices
Beyond the technical steps, good design principles make the difference between text that gets read and text that gets ignored. Here are the rules I follow on every project.
Size Matters
Text that’s too small is the number one reason viewers skip over captions. A good rule is that body text should be at least 1/30th the height of your image. For a 1080px Instagram post, body text should be at least 36px. Headlines should be at least 1/12th the image height, so 90px or larger for Instagram.
Hierarchy Guides the Eye
Use different font sizes to create hierarchy. The most important text should be the biggest. Secondary text should be smaller. Don’t make all text the same size, because that forces the viewer to read everything to find what matters.
White Space Improves Comprehension
Give your text room to breathe. Don’t push text all the way to the edge of the image. Leave at least 5-10% padding on all sides. For workflows targeting specific platforms, knowing the right TikTok profile picture dimensions or Etsy shop banner sizing for text overlays helps you design within the safe zones.
Test on Multiple Devices
What looks good on your desktop might be unreadable on a phone. Before finalizing any design, view it on at least two devices: a desktop monitor and a phone. If text is hard to read on either, go back and adjust the size, contrast, or position.
Frequently Asked Questions
How to add text in image online free?
Upload your photo to a free online editor like Canva, Adobe Express, or Kapwing. Click the Text button to add a text box, type your message, customize the font and color, then download the result as a PNG or JPEG. The whole process takes 2-5 minutes.
How do I add text to an existing picture?
Open the existing picture in any free online editor (Canva, Adobe Express, or Kapwing), add a text box from the Text menu, type your message, and drag it onto the image where you want it. The text sits on top of the existing picture as a new layer, and you can reposition, resize, and restyle it freely.
How can I add handwritten text to an image online for free?
Two main options: (1) Use a handwriting-style font from the free font library in Canva or Adobe Express. (2) Write your message on white paper, take a photo, and upload it to the editor. Use a free background remover like remove.bg to strip the white background, then drag the handwriting onto your main image.
What is the best free app to put text on pictures?
For all-around use, Canva is the best free app to put text on pictures. It has over 1,000 free fonts, no watermark, templates, and works in any browser. For more polished results, Adobe Express offers Adobe Fonts and curved text. For animated text, Kapwing is the top choice.
Can I add text to an image without paying for Photoshop?
Yes. Canva, Adobe Express, and Kapwing all let you add text to images for free in your browser with no software download. They handle 90% of common text-overlay tasks. For advanced editing like custom text paths or batch editing, the free open-source desktop app GIMP is the next step up.
How do I add curved text to a photo online free?
Adobe Express has the easiest curved text option: add a text box, type your message, and click the Curved Text toggle in the right panel. Kapwing also has a Text Curve feature in the styling panel. Canva doesn’t have a one-click curve, but you can manually rotate individual letters to follow a curve.
How do I edit existing text in an image online?
You need to remove the old text first using an AI inpainting tool like Adobe Firefly, Canva’s Magic Eraser, or Cleanup.pictures. Then add new text using any of the free editors. For precise edits, Photopea (a free browser-based Photoshop alternative) lets you manually remove text with the Clone Stamp tool.
Is it safe to upload photos to free online text editors?
Most reputable editors (Canva, Adobe Express, Kapwing) store images temporarily for processing and delete them within hours or days. For maximum privacy, use Photopea, which processes images locally in your browser. Avoid uploading sensitive documents like IDs or financial records to any free online tool.
Final Thoughts on Adding Text to Images for Free Online
Adding text to an image for free online is one of those tasks that feels harder than it should be until you find the right tool. Once you pick between Canva, Adobe Express, and Kapwing based on the project requirements, the actual process takes a few minutes. If you want polished results without paying for Photoshop, these three tools cover nearly every use case from social media graphics to client-ready designs.
I started using these tools for casual meme creation and now use them weekly for client work. The biggest jump in quality comes from spending an extra two minutes on font choice and contrast. Start with a quick Canva edit, branch out to Adobe Express for curved text, and keep Kapwing in your back pocket for animated projects. You’ll be producing text overlays that look professional in no time.