
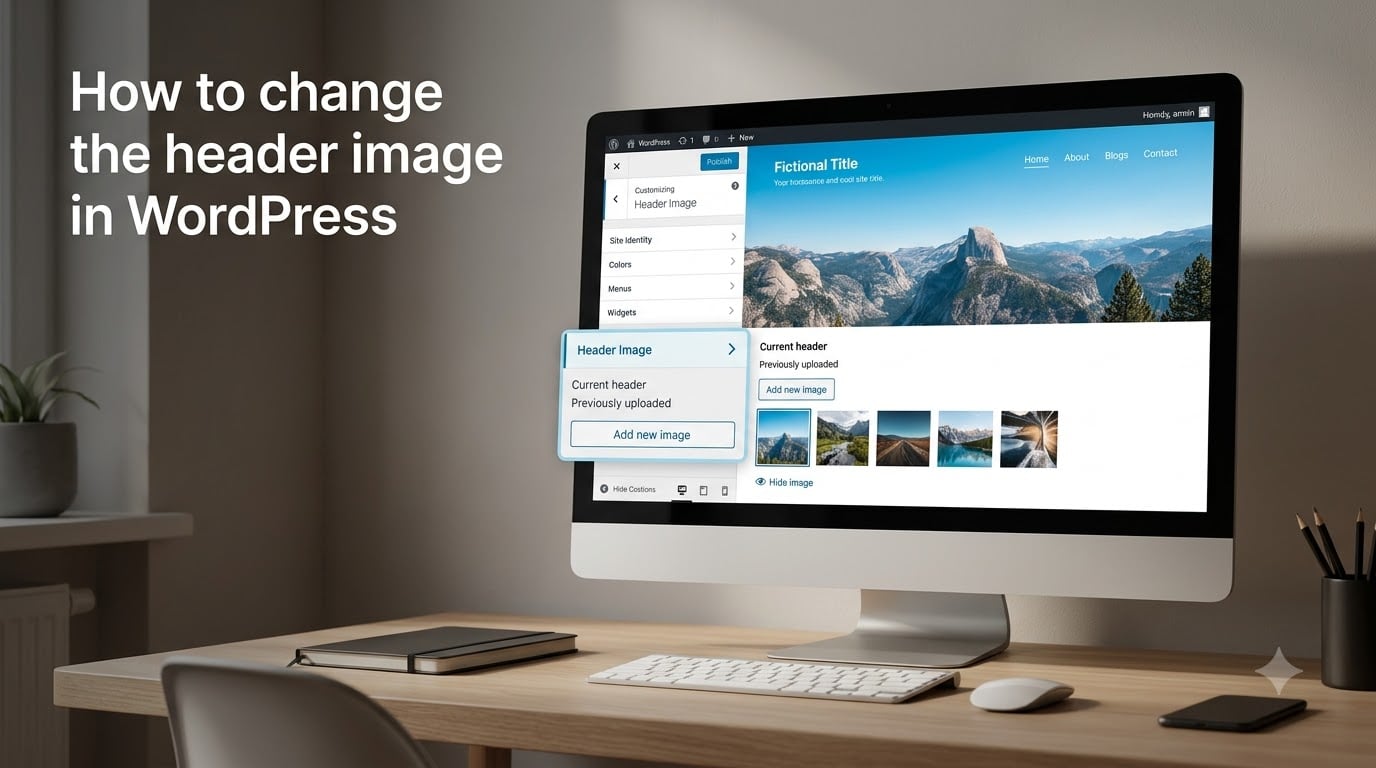
Your header is the first thing visitors see when they land on your WordPress site. It sets the tone for your brand, hosts your navigation, and frames everything below it.
I have changed hundreds of header images across WordPress sites over the years, from small blogs to client storefronts. The truth is that the process has changed a lot since WordPress 5.9 introduced Full Site Editing, and most guides online still teach the old Customizer-only method.
In this guide, I will walk you through how to change the header image in WordPress using every method that actually works in 2026. You will learn the Customizer path, the Full Site Editor path for block themes, and a page builder path with Elementor. I will also cover header dimensions, free image resources, and the troubleshooting fixes that solve 90 percent of common problems.
By the end, you will know exactly which method fits your theme and how to avoid the mistakes that lead to blurry, oversized, or invisible headers.
Table of Contents
- Quick Answer: How to Change Your Header Image in WordPress
- What Is the WordPress Header
- Before You Start: Recommended Header Image Specs
- Method 1: Change Header Image via the WordPress Customizer
- Method 2: Change Header Image Using the Full Site Editor (Block Themes)
- Method 3: Change Header Image Using Elementor
- How to Change the Header Text (Site Title and Tagline)
- How to Add or Change the Header Logo
- How to Set a Different Header Image for Specific Pages
- Troubleshooting: Common Header Image Problems
- Frequently Asked Questions
- How do I change the header image in WordPress?
- How do I add a header image to WordPress?
- How do I customize my WordPress header without touching code?
- Why is my header image not showing in WordPress?
- What is the recommended header image size for WordPress?
- How do I set a different header image for each page in WordPress?
- Conclusion
Quick Answer: How to Change Your Header Image in WordPress
Here is the fastest way to change the header image in WordPress. This 4-step process works on most classic themes that include a “Header” option in the Customizer.
- Log into your WordPress dashboard and go to Appearance › Customize.
- In the Customizer sidebar, click Header or Header Image.
- Click Add Image, then upload a new image from your computer or pick one from the Media Library.
- Crop if needed, then click Publish to make the change live on your site.
Recommended header image size: 1920 x 1080 pixels (or larger), under 200 KB, in JPG or PNG format. If your theme uses a fixed crop ratio, design your image to match.
What Is the WordPress Header
The WordPress header is the top section that appears on every page of your site. It is more than just a banner image; it is the container that usually holds your logo, site title, tagline, and main navigation menu.
Most themes treat the header as a single template area. The exact elements inside that area depend on your theme. Common header elements include:
- Site logo — the small image that represents your brand.
- Site title — the text version of your brand name.
- Tagline — a short description shown beneath or beside the title.
- Navigation menu — the primary menu visitors use to move around your site.
- Header image or banner — a wide visual that sits behind or below the navigation.
- Search box, social icons, or call-to-action button — optional extras supported by many themes.
When you change the header image in WordPress, you are usually swapping the banner visual while leaving the other elements in place. Some themes use the header image as a true background, while others use it as a logo replacement.
Before You Start: Recommended Header Image Specs
Most “header image problems” I see in the WordPress forums come from uploading the wrong size. A 500-pixel-wide image stretched across a 1920-pixel screen looks blurry. A 5 MB image slows your site to a crawl. Get the dimensions right before you upload.
Use this checklist before you upload any header image:
- Width: 1920 pixels is the safe baseline for full-width headers. Some themes crop to 1600 or 1200, so check your theme documentation.
- Height: Between 400 and 720 pixels works for most banners. Tall headers push content below the fold on mobile.
- Aspect ratio: Match the crop ratio your theme uses (often 16:9 or 21:9) to avoid awkward cropping.
- File format: JPG for photos, PNG for logos with transparency, WebP for the best compression if your site supports it.
- File size: Keep it under 200 KB. Compress with ShortPixel, TinyPNG, or Squoosh before uploading.
- Resolution: 72 dpi is fine for web. Save at “Save for Web” quality in Photoshop or export at 80% in your editor of choice.
- Alt text: Always set descriptive alt text. It helps SEO and accessibility.
Header Image Dimensions by Popular Theme
Header specs vary by theme. Use the table below as a starting point, then confirm with your theme’s documentation.
| Theme | Recommended Width | Recommended Height | Notes |
|---|---|---|---|
| Astra | 1920 px | 500 px | Custom Layouts allow flexible sizing. |
| Twenty Twenty-Four | 1920 px | 1080 px | Block theme, uses Full Site Editor. |
| GeneratePress | 1920 px | 600 px | Header Element module controls size. |
| OceanWP | 1920 px | 500 px | Full-width header supported. |
| Kadence | 1600 px | 400 px | Transparent header option available. |
| Twenty Twenty-Three | 1920 px | 720 px | Default block theme shipped with WordPress 6.1. |
Tip: When in doubt, upload an image that is wider than you think you need. Browsers and themes will scale it down for mobile and tablets. Scaling up causes the blurriness users complain about most.
Method 1: Change Header Image via the WordPress Customizer
This is the most common method and works on every classic theme that supports a header image option. It is also the method featured in the snippet boxes that show up in search results, so it is worth learning even if you plan to use a different method.
Follow these steps to change your header image through the Customizer:
- From your WordPress dashboard, hover over Appearance in the left sidebar and click Customize.
- The Customizer opens with a live preview of your site on the right and a settings panel on the left.
- Look for a panel labeled Header Image, Header, or Site Identity. Click it to expand.
- Click the Add Image button. A media picker opens.
- Either drag a new file into the upload area or pick an existing image from your Media Library.
- Once selected, you will see a crop tool. Adjust the crop window to match the area you want visible, then click Crop and Publish.
- If your theme offers pre-made header images, you can also pick one from the built-in library and customize it later.
- Click the blue Publish button at the top of the Customizer to make your new header live.
That is it. The change appears instantly across your site, and a revision is saved so you can roll back if you do not like the new look.
Note for newer themes: Some themes launched after WordPress 5.9 do not include a “Header Image” panel. If you do not see it, your theme uses the Full Site Editor instead, which I cover in Method 2.
Method 2: Change Header Image Using the Full Site Editor (Block Themes)
If your site uses a block theme like Twenty Twenty-Four, Twenty Twenty-Three, or any theme that says “Full Site Editing” in its description, the Customizer is gone. Instead, you edit the header through the Site Editor.
This method also covers how to change the header image in WordPress 6.x block themes, which most older guides skip.
Here is how to swap the header image using the Site Editor:
- From your dashboard, go to Appearance › Editor.
- The Site Editor opens with your home template on the left and a block toolbar on the right.
- Click anywhere inside the header area at the top of the preview. WordPress will highlight the header block with a blue outline.
- A small toolbar appears above the header. Click the List View icon (the stacked lines symbol) and select the Header template part.
- You can now click on the existing image block inside the header and hit the Replace button in the block toolbar, or click the image to open its settings.
- Pick a new image from the Media Library or upload a fresh file.
- Resize, reposition, and adjust focal points using the image block settings in the right panel.
- Click Save at the top right to apply the new header.
The Full Site Editor gives you much more control than the Customizer. You can layer text over the image, change colors per page, and even turn the header transparent with a few clicks. It is the recommended path for any site running WordPress 5.9 or newer with a block theme.
Method 3: Change Header Image Using Elementor
If you build your site with Elementor, you are not limited to the theme’s built-in header options. With the free “Elementor – Header, Footer & Blocks Builder” plugin, you can design a completely custom header and swap the image whenever you want.
Follow these steps:
- Install and activate the Elementor – Header, Footer & Blocks Builder plugin from Plugins › Add New.
- Go to Appearance › Header Footer & Blocks Builder and click Add New Template.
- Set Type to Header, give it a name, and click Edit with Elementor.
- In the Elementor panel on the left, drag an Image widget into your header layout.
- Click the image area to open settings. Upload a new image, choose one from the Media Library, or pick a brand logo.
- Style the image using the Style tab. Set width, alignment, opacity, and link as needed.
- Set the display condition to “Entire Site” or pick specific pages where this header should appear.
- Click Publish to save the template.
- Go to Appearance › Customize › Header Footer Builder and enable the template to make it your active site header.
Elementor gives you pixel-level control, plus the ability to use different headers for different pages. If you want to truly change your header image in WordPress with creative freedom, this is the most flexible option.
How to Change the Header Text (Site Title and Tagline)
Header text is often the simplest change. WordPress lets you update your site title and tagline from one place, and most themes display them automatically in the header area.
To change header text in WordPress:
- Go to Settings › General in your dashboard.
- Update the Site Title field with your new name.
- Update the Tagline field with a short description (this becomes your site’s motto).
- Click Save Changes.
- To control how the title and tagline appear inside the header, go to Appearance › Customize › Site Identity.
- Toggle the Display Site Title and Tagline option on or off, and choose whether to show a logo alongside.
- Click Publish.
For block themes, find these settings under Appearance › Editor › Header › Site Title block.
How to Add or Change the Header Logo
A logo and a header image are two different things, but they live in the same area. Logos are usually small and square, while header images span the full width. Most modern themes let you set both.
To add or change your header logo:
- Go to Appearance › Customize › Site Identity.
- Click Select Logo.
- Upload a new logo file. PNG with a transparent background works best.
- Adjust the logo width using the slider until it looks balanced in the header.
- Click Publish.
Recommended logo dimensions: 250 x 100 pixels for a horizontal logo, or 160 x 160 pixels for a square mark. Keep the file under 50 KB.
For block themes, click the logo placeholder in the Site Editor and use the Replace button to swap it.
How to Set a Different Header Image for Specific Pages
Many site owners want a unique header on their landing pages, sales pages, or homepage. This is possible without code, but it depends on your theme.
Here are three common approaches:
- Using a theme with built-in support: Themes like Astra, GeneratePress Premium, and Divi include per-page header settings. Edit the page, scroll to the page settings, and look for a “Page Header” or “Custom Header” option.
- Using Elementor Pro: Elementor Pro lets you build multiple header templates and assign each one to specific pages or sections through Display Rules.
- Using a plugin: Plugins like “Unique Headers” or “WP Display Header” let you upload a unique header per page or post from the editor sidebar.
If your current theme does not support per-page headers, your cleanest path is to upgrade to a flexible theme like GeneratePress Premium or Astra Pro. Both let you create unlimited header layouts and assign them where needed.
Troubleshooting: Common Header Image Problems
Even when you follow the steps exactly, headers sometimes misbehave. These are the issues I see most often in the WordPress support forums, with the fixes that actually work.
Header Image Not Showing After Upload
- Theme limitation: Some themes do not support a header image. Switch to a theme that does, or use Elementor.
- Wrong image size: If your image is below the minimum width, some themes will not display it. Re-export at 1920 px wide.
- Caching: Clear your site cache (WP Rocket, LiteSpeed, or your host’s cache) and your browser cache.
- Wrong upload location: Make sure you uploaded it as the header image, not just inserted into a page.
Header Image Looks Blurry or Pixelated
- Upload a larger source file. Aim for at least 1920 x 1080.
- Make sure the image is at 72 dpi and saved for web.
- Avoid stretching a small image. Design at the final size or larger.
Header Image Is Too Large or Pushes Content Down
- Resize the image to match your theme’s recommended height (usually 400-720 px).
- Use the crop tool to remove extra height before publishing.
- Consider switching to a sticky or transparent header style for more compact layouts.
Header Image Not Cropping Correctly
- Check the focal point setting on your image block if using the Site Editor.
- Re-upload the image at the exact aspect ratio your theme expects.
- For precise control, crop the image in an external editor before uploading.
Cannot Remove the Old Header Image
- Go back to the Customizer › Header Image panel and click the Remove button.
- For block themes, select the image block in the Site Editor and click the three dots menu, then Remove.
- Clear cache after removal.
Sticky Header Jumps or Glitches on Mobile
- Disable any sticky header scripts you have added with custom code.
- Use your theme’s built-in sticky header toggle instead of custom CSS.
- Test in another browser. Some Android browsers handle sticky positioning poorly.
Frequently Asked Questions
How do I change the header image in WordPress?
Go to Appearance u0026gt; Customize in your WordPress dashboard, click the Header Image or Header panel, then click Add Image. Upload your new file, crop if needed, and click Publish to make it live.
How do I add a header image to WordPress?
From your dashboard, navigate to Appearance u0026gt; Customize u0026gt; Header Image. Click Add Image, upload a file from your computer, or pick one from the Media Library. Crop to match your theme, then click Publish.
How do I customize my WordPress header without touching code?
Use the built-in Customizer under Appearance u0026gt; Customize, or the Full Site Editor under Appearance u0026gt; Editor if you have a block theme. Both let you swap images, change text, and adjust layouts with no coding required.
Why is my header image not showing in WordPress?
The most common causes are theme limitations, image size below the minimum width, or caching. Clear your cache, re-upload at 1920 px wide, and confirm your theme supports a header image. If not, switch themes or use Elementor.
What is the recommended header image size for WordPress?
Use 1920 pixels wide and between 400 and 720 pixels tall. Keep the file under 200 KB in JPG, PNG, or WebP format. Match your theme’s aspect ratio to avoid awkward cropping.
How do I set a different header image for each page in WordPress?
Use a theme that supports per-page headers like Astra or GeneratePress Premium, install Elementor Pro with multiple header templates and display rules, or use a plugin like Unique Headers. All three options let you assign a custom header to specific pages without code.
Conclusion
Learning how to change the header image in WordPress comes down to knowing your theme. Classic themes use the Customizer, block themes use the Site Editor, and page builder users go through Elementor. All three paths take less than five minutes once you know where to look.
Pick the method that matches your setup, upload an image at 1920 x 600 pixels or larger, and remember to compress before publishing. If something goes wrong, the troubleshooting section above covers the fixes that resolve most issues without needing a developer.