
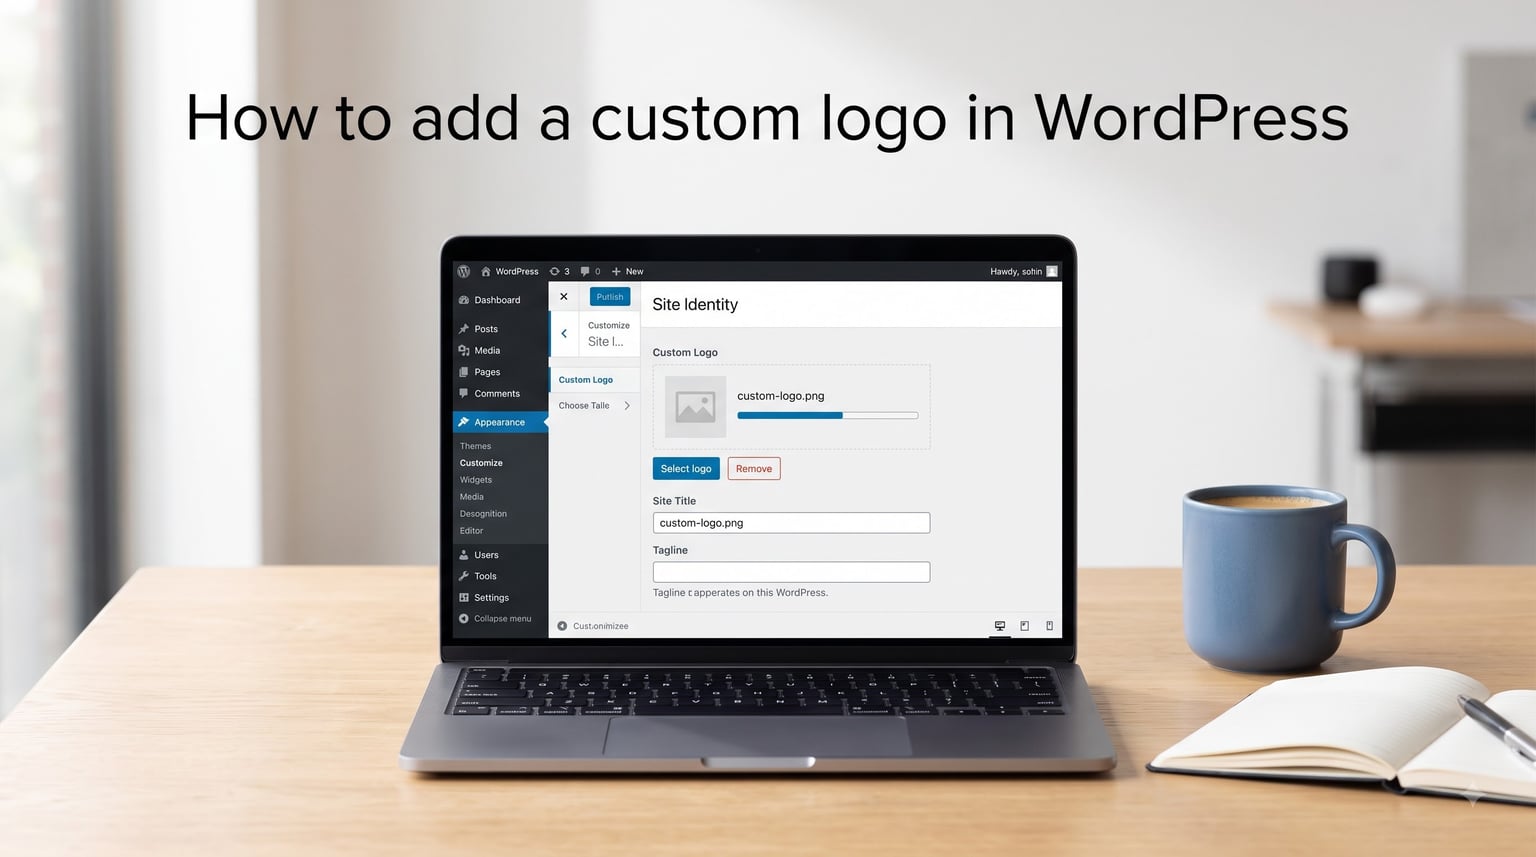
Adding a custom logo to your WordPress website takes about five minutes, and it is one of the fastest ways to make your site look professional. Whether you are running a blog, an online store, or a business portfolio, that logo in the header is the first thing visitors notice. If you have ever wondered how to add a custom logo in WordPress, this guide walks you through every method available in 2026 — from the standard Customizer to the block-based Site Editor, Elementor’s Header Builder, and even custom CSS.
I have spent years building WordPress sites, and the logo question comes up constantly. The confusion usually stems from one simple fact: where you upload your logo depends entirely on what type of theme you are using. Classic themes use the WordPress Customizer. Block themes use the Site Editor. Page builder themes like Elementor have their own Header Builder. I will cover all of these so you can pick the right path.
By the end of this article, you will know exactly how to upload your logo, choose the right file format and dimensions, fix common issues like blurry or missing logos, and even customize the login page with your branding. Let’s get started.
Table of Contents
- Quick Overview: 3 Ways to Add a Custom Logo in WordPress
- How to Add a Custom Logo in WordPress via the Customizer
- How to Add a Custom Logo in WordPress Block Themes (Site Editor)
- How to Add a Custom Logo in WordPress with Elementor
- Classic Themes vs Block Themes: Which Logo Method to Use
- Recommended Logo File Formats and Sizes
- How to Customize Logo Positioning with CSS
- How to Change the WordPress Login Page Logo
- How to Get Your Logo URL Programmatically (Advanced)
- Troubleshooting Common WordPress Logo Issues
- Best Free Logo Maker Tools for WordPress Beginners
- Logo Optimization Tips for Website Speed
- Frequently Asked Questions
- Conclusion
Quick Overview: 3 Ways to Add a Custom Logo in WordPress
Before diving into step-by-step instructions, here is a quick breakdown of the three main methods. Pick the one that matches your theme type.
Method 1 — WordPress Customizer (Classic Themes): Go to Appearance > Customize > Site Identity > Select Logo. This works for most traditional themes like Astra, GeneratePress, OceanWP, and Twenty Twenty-One.
Method 2 — Site Editor / Full Site Editing (Block Themes): Go to Appearance > Editor > Template Parts > Header. Click the Site Logo block and upload your image. This applies to block themes like Twenty Twenty-Four, Twenty Twenty-Five, and Twenty Twenty-Six.
Method 3 — Page Builder Header (Elementor, Divi, Beaver Builder): Open your page builder’s header template and replace the logo widget. Elementor Pro users go to Templates > Theme Builder > Header.
If you are not sure which theme type you have, check under Appearance in your WordPress dashboard. If you see “Editor” as an option, you are on a block theme. If you only see “Customize,” you are on a classic theme.
How to Add a Custom Logo in WordPress via the Customizer
The WordPress Customizer is the most common way to add a logo, and it works for the majority of themes in 2026. This method uses the Site Identity panel, which has been a standard feature since WordPress 4.5. Here is the step-by-step process.
Step 1: Log in to your WordPress dashboard. You can access it by adding /wp-admin to your domain name (for example, yoursite.com/wp-admin).
Step 2: In the left sidebar, navigate to Appearance > Customize. This opens the WordPress Customizer in a live preview window.
Step 3: Click on Site Identity in the Customizer menu. This section controls your site title, tagline, logo, and site icon (favicon).
Step 4: Click the Select Logo button. A media window will pop up.
Step 5: Upload your logo file or select one from your media library. Click Set as logo at the bottom right.
Step 6: WordPress may prompt you to crop the image. Drag the crop handles to adjust, then click Crop Image. If your logo has a transparent background, the crop step still applies but will not affect transparency.
Step 7: Click the blue Publish button at the top of the Customizer to save your changes. Your logo will now appear in the header across your entire site.
That is it. The whole process takes less than two minutes once you have your logo file ready. If you do not see a “Select Logo” button in Site Identity, your theme may not support custom logos natively. In that case, you will need to use a different theme or add custom logo support manually via your theme’s functions.php file.
What If There Is No Select Logo Button?
Some older or minimal themes do not include custom logo support. You can enable it by adding a small code snippet to your theme. Go to Appearance > Theme File Editor and open functions.php. Add this line:
add_theme_support( 'custom-logo' );
Save the file and refresh the Customizer. The Select Logo option should now appear under Site Identity. If you are using a child theme (which I always recommend), add the code there so updates do not overwrite your changes.
How to Add a Custom Logo in WordPress Block Themes (Site Editor)
Block themes, also called Full Site Editing (FSE) themes, use a completely different approach. Instead of the Customizer, you use the Site Editor to manage your header and logo. This method applies to any theme built for the Gutenberg block editor, including the default Twenty Twenty-Four, Twenty Twenty-Five, and Twenty Twenty-Six themes.
Step 1: In your WordPress dashboard, go to Appearance > Editor. This opens the Site Editor.
Step 2: Click on Patterns or Template Parts in the left navigation, then select Header. In some WordPress versions, you will see “Design” in the sidebar — click that, then “Template Parts,” then “Header.”
Step 3: Click directly on the Site Logo block in the header preview. If your header does not have a Site Logo block yet, click the block inserter (the + icon) and search for “Site Logo,” then add it.
Step 4: Click Choose Logo or the image placeholder. Upload your logo file or select one from the media library.
Step 5: Once the logo appears, you can adjust its size using the slider in the block toolbar. You can also set the logo width in pixels for precise control.
Step 6: Click Save at the top right of the editor to apply your changes to the live site.
One advantage of the Site Editor is that you get real-time visual control over the logo size and placement. You can drag the Site Logo block to different positions within the header layout. The changes apply globally across all pages that use that header template.
Switching Between Site Logo and Site Title
Block themes let you toggle between a logo image and a text-based site title. In the Site Logo block settings on the right sidebar, you will find an option to display the site title alongside or instead of the logo. This is useful if you want a compact header that combines both elements.
How to Add a Custom Logo in WordPress with Elementor
Elementor is the most popular WordPress page builder, and it has its own way of handling logos through the Header Builder. If you are using Elementor Pro, you have access to the Theme Builder, which gives you full visual control over your header. Here is how to add or change your logo.
Step 1: In your WordPress dashboard, go to Templates > Theme Builder.
Step 2: Click on the Header tab, then either edit your existing header template or click Add New to create one.
Step 3: In the Elementor editor, locate the Site Logo widget in your header layout. If it is not there, drag the Site Logo widget from the left panel into your header section.
Step 4: Click on the Site Logo widget. In the left panel under the Content tab, click Choose Image and upload or select your logo.
Step 5: Under the Style tab, you can set a custom logo width, add a hover animation, and adjust spacing.
Step 6: Click Update or Publish to save. Elementor will ask you to set display conditions — choose “Entire Site” so your header appears everywhere.
One common pain point I see on Reddit is Elementor users going to Appearance > Customize and not finding their logo there. That is because Elementor manages the header separately. If your header was built with Elementor Theme Builder, you need to change the logo inside Elementor, not the Customizer.
For Elementor Free users (without Theme Builder), the logo is still controlled through the WordPress Customizer. Go to Appearance > Customize > Site Identity and follow the standard upload process.
Classic Themes vs Block Themes: Which Logo Method to Use
One of the biggest sources of confusion is figuring out which logo method applies to your WordPress setup. Here is a comparison to help you decide.
Classic themes use the WordPress Customizer. Examples include Astra, GeneratePress, OceanWP, Newspaper, and any theme released before WordPress 5.9. You manage your logo through Appearance > Customize > Site Identity. These themes may also offer additional logo settings in their own theme options panel.
Block themes use the Site Editor (Full Site Editing). Examples include Twenty Twenty-Four, Twenty Twenty-Five, Twenty Twenty-Six, Blocksy (FSE mode), and any theme built on the block-based architecture. You manage your logo through Appearance > Editor > Template Parts > Header using the Site Logo block.
Page builder themes use the builder’s own header system. Elementor Pro uses Theme Builder. Divi uses the Divi Theme Builder. Beaver Builder uses Beaver Themer. These tools give you drag-and-drop control over the header layout including the logo position.
Here is a quick rule of thumb: if your theme has both a Customizer and a Site Editor, try the Customizer first. If the logo option is not there or is grayed out, switch to the Site Editor. And if you are using a page builder, always check its dedicated header builder before looking elsewhere.
Recommended Logo File Formats and Sizes
Choosing the right file format and dimensions for your WordPress logo makes the difference between a sharp, professional header and a blurry mess. Here is what I recommend based on years of testing across dozens of themes.
PNG: The Best All-Around Choice
PNG is my go-to format for WordPress logos because it supports transparent backgrounds and lossless compression. Your logo will look crisp on any header color, whether light or dark. Use PNG when your logo has text, sharp edges, or transparent areas. A file size of 50 to 200 KB is ideal for fast loading.
SVG: Best for Sharpness and Scalability
SVG (Scalable Vector Graphics) is the highest quality option because it scales infinitely without losing sharpness. An SVG logo looks perfect on a phone screen and a 4K monitor alike. However, WordPress does not allow SVG uploads by default for security reasons. You need a plugin like SVG Support or Safe SVG to enable SVG uploads safely. I recommend SVG for modern themes and retina displays.
JPG: Not Recommended for Logos
JPG does not support transparency, which means your logo will have a white or colored box around it. This usually looks unprofessional. Stick with PNG or SVG unless your logo is a full-bleed photograph with no transparency needs.
Recommended Logo Dimensions
Most WordPress headers display logos at around 250 x 100 pixels. However, I recommend uploading a file that is at least twice that size — around 500 x 200 pixels — to look sharp on high-resolution (retina) displays. Here are some general guidelines for common use cases.
Standard header logo: 250 x 100 pixels display size, upload at 500 x 200 pixels for retina sharpness.
Compact header logo (centered): 200 x 80 pixels display, upload at 400 x 160 pixels.
Wide horizontal logo: 400 x 100 pixels display, upload at 800 x 200 pixels.
Site icon / favicon: 512 x 512 pixels (WordPress automatically generates all smaller sizes from this).
The aspect ratio matters more than exact pixel dimensions. Keep your logo file under 200 KB for optimal page speed. If your file is larger, use a compression tool like TinyPNG or ShortPixel before uploading.
Transparent Background: Why It Matters
Always use a logo with a transparent background (PNG or SVG). If your header has a colored or gradient background, a white box around your logo will look amateurish. You can remove backgrounds using tools like remove.bg, Canva’s background remover, or Photoshop.
How to Customize Logo Positioning with CSS
Sometimes your theme places the logo in a spot that does not match your design vision. Custom CSS gives you full control over logo alignment, spacing, and responsive behavior. Here are the most common CSS tweaks I use.
Centering Your Logo in the Header
Most themes default to a left-aligned logo. To center it, you need to target the logo’s CSS class. Right-click your logo in the browser, select Inspect, and look for the class name. Common classes include .custom-logo, .site-logo, and .wp-block-site-logo. Add this CSS to Appearance > Customize > Additional CSS:
.custom-logo-link { display: block; text-align: center; margin: 0 auto; }
For block themes, the Site Logo block has built-in alignment controls in the editor. You can set it to left, center, or right without writing any CSS at all.
Resizing the Logo with CSS
If your theme does not offer a logo size slider, you can force a specific width with CSS. This is useful when your logo appears too large on desktop or too small on mobile.
.custom-logo { max-width: 200px; height: auto; }
Making the Logo Responsive on Mobile
Your desktop logo might be too wide for phone screens. Add a media query to shrink it on smaller devices:
@media (max-width: 768px) { .custom-logo { max-width: 150px; } }
Always test your logo on multiple screen sizes after making CSS changes. Use your browser’s responsive design mode or a tool like BrowserStack to check how it looks on different devices.
How to Change the WordPress Login Page Logo
By default, the WordPress login page shows the WordPress logo. You can replace it with your own branding using a small code snippet in your theme’s functions.php file. This is a nice touch for client sites and membership portals.
Go to Appearance > Theme File Editor and open functions.php (in your child theme, ideally). Add the following code, replacing the image URL with your own logo file URL from the media library:
function my_custom_login_logo() { echo '<style type="text/css"> h1 a { background-image: url(https://yoursite.com/wp-content/uploads/your-logo.png) !important; background-size: contain !important; width: 100% !important; } </style>'; } add_action('login_head', 'my_custom_login_logo');
Save the file and visit your login page (yoursite.com/wp-login.php). Your logo will now appear instead of the default WordPress logo. To also link the logo to your homepage instead of wordpress.org, add this filter:
function my_login_logo_url() { return home_url(); } add_filter('login_headerurl', 'my_login_logo_url');
If you prefer not to edit code, plugins like White Label CMS and Custom Login let you change the login page logo from a settings page with no coding required.
How to Get Your Logo URL Programmatically (Advanced)
If you are building a custom theme or need to reference your logo URL in code, WordPress provides a built-in function. This is useful for custom header templates, email templates, or third-party integrations.
Use the following PHP code to retrieve your custom logo URL:
$logo_url = wp_get_attachment_image_url( get_theme_mod( 'custom_logo' ), 'full' ); echo $logo_url;
This fetches the full-size URL of your uploaded custom logo. You can replace ‘full’ with any registered image size like ‘thumbnail’ or ‘medium’ if you need a smaller version. For the complete logo markup (including the image tag and link), use the_custom_logo() or get_custom_logo().
Troubleshooting Common WordPress Logo Issues
Even with the right steps, things can go wrong. Here are the most common logo problems I encounter and how to fix each one.
Logo Not Showing After Uploading
This is the number one complaint on Reddit’s WordPress community. If your logo does not appear after uploading and publishing, check these things in order. First, clear your browser cache and any caching plugin you have installed (WP Rocket, W3 Total Cache, LiteSpeed Cache). Cache is the culprit about 80 percent of the time. Second, make sure you clicked Publish (not just Save Draft) in the Customizer. Third, check if you are using a page builder like Elementor — if so, the logo needs to be set in the Theme Builder, not the Customizer. Finally, deactivate your caching and optimization plugins temporarily to see if one of them is blocking the image from loading.
Logo Looks Blurry or Low Quality
A blurry logo usually means your image file is too small for the display area. Upload a file that is at least 2x the display size for retina sharpness. For example, if your header shows the logo at 250 pixels wide, upload a 500-pixel-wide version. Also check that your image optimization plugin is not compressing the logo too aggressively. Add the logo file to the plugin’s exclusion list if needed.
Logo Is Too Large or Gets Cropped
WordPress may force you to crop the logo during upload if the image dimensions exceed the theme’s logo size limit. To avoid this, resize your logo to match your theme’s recommended dimensions before uploading. Check your theme documentation for the ideal logo size. You can also use CSS (as covered above) to override the display size after upload.
SVG File Upload Not Allowed
WordPress blocks SVG uploads by default because SVG files can contain malicious scripts. To upload SVG safely, install the Safe SVG or SVG Support plugin. These plugins sanitize SVG files on upload to strip any potentially dangerous code. Once installed, you can upload SVG logos just like any other image.
Logo Does Not Update After Replacement
If you replaced your logo but the old one is still showing, caching is almost always the cause. Clear your site cache (plugin cache, server cache, and CDN cache like Cloudflare). Also check that you uploaded the new logo through the Customizer or Site Editor rather than just replacing the file in the media library — WordPress may still be referencing the old attachment ID.
Best Free Logo Maker Tools for WordPress Beginners
If you do not have a logo yet, you can create one before uploading it to WordPress. WordPress itself does not include a built-in logo maker, but there are several free and affordable tools that work well for beginners.
Canva: The easiest option for non-designers. Canva offers hundreds of free logo templates you can customize with your brand name and colors. Export as PNG with a transparent background (Pro feature) or JPG (free).
Hatchful by Shopify: A completely free logo maker that generates multiple logo variations from a few questions about your business. Downloads include sizes optimized for websites and social media.
GIMP: A free, open-source alternative to Photoshop. GIMP has a steeper learning curve but gives you full control over layers, transparency, and export formats including PNG and SVG.
Inkscape: The best free tool for creating SVG logos. Inkscape is a vector graphics editor similar to Adobe Illustrator. If you want a scalable logo that looks sharp at any size, create it here.
Looka: An AI-powered logo maker that generates custom designs based on your preferences. You can preview designs for free and download high-resolution files with a paid plan.
For most beginners, I recommend starting with Canva. It is intuitive, produces clean results, and the transparent PNG export (even on the free tier with some workarounds) works perfectly with WordPress.
Logo Optimization Tips for Website Speed
Your logo is one of the first elements that loads on every page. A bloated logo file can slow down your entire site and hurt your Core Web Vitals scores. Here is how to keep it fast.
Compress your logo before uploading. Use TinyPNG, ShortPixel, or Squosh to reduce PNG and JPG file sizes by 50 to 80 percent without visible quality loss. Aim for under 100 KB for a standard header logo.
Consider converting your logo to WebP format. WebP files are 25 to 35 percent smaller than PNGs at the same quality. Most modern browsers and WordPress image plugins support WebP natively.
Enable lazy loading for below-the-fold images, but keep your logo loading normally. Your header logo should load immediately since it is above the fold. Most performance plugins let you exclude specific images from lazy loading.
Use a CDN (Content Delivery Network) like Cloudflare or BunnyCDN to serve your logo from edge locations close to your visitors. This reduces load time, especially for international traffic.
Frequently Asked Questions
What size should my WordPress logo be?
The recommended display size for a WordPress header logo is 250 x 100 pixels, but you should upload a file at least 500 x 200 pixels to look sharp on retina displays. For the site icon (favicon), upload a 512 x 512 pixel square image. Always keep the file size under 200 KB for fast loading.
Why does my WordPress logo look blurry?
Your logo looks blurry because the uploaded image is too small for the display area. Upload a version that is at least twice the display width (2x for retina screens). Also check that your image optimization plugin is not over-compressing the logo file.
Can I use an SVG logo in WordPress?
WordPress blocks SVG uploads by default for security reasons, but you can enable SVG support by installing the Safe SVG or SVG Support plugin. These plugins sanitize SVG files on upload to remove any potentially dangerous code. SVG is the best format for logos because it scales without losing sharpness.
How do I change my WordPress logo after uploading?
Go to Appearance u0026gt; Customize u0026gt; Site Identity, click the existing logo image, and select Remove. Then click Select Logo to upload your new file and click Publish. For block themes, edit the Site Logo block in Appearance u0026gt; Editor u0026gt; Template Parts u0026gt; Header. Clear your cache after changing logos so the update appears immediately.
Does WordPress have a built-in logo maker?
No, WordPress does not include a built-in logo maker. You need to create your logo using a tool like Canva, Hatchful, GIMP, or Inkscape before uploading it. Canva is the easiest option for beginners and offers free logo templates you can customize and export.
How do I get the URL of a custom logo in WordPress?
Use the PHP function wp_get_attachment_image_url( get_theme_mod( ‘custom_logo’ ), ‘full’ ) to retrieve your custom logo URL programmatically. You can also find the URL manually in the media library by clicking on your logo image and copying the file URL from the right sidebar.
Conclusion
Learning how to add a custom logo in WordPress is a quick win that instantly upgrades your site’s professional appearance. The method you choose depends on your theme type: the Customizer for classic themes, the Site Editor for block themes, and the Theme Builder for page builders like Elementor.
Remember to use a PNG file with a transparent background, upload at 2x your display size for retina sharpness, and keep the file under 200 KB. If your logo does not show up after uploading, clear your cache first — it solves the problem in most cases.
Now that your logo is live, take the next step and set your site icon (favicon) so your branding appears in browser tabs and mobile bookmarks. Then explore custom CSS positioning if you want to fine-tune the logo placement in your header. Your WordPress branding is in your hands.