
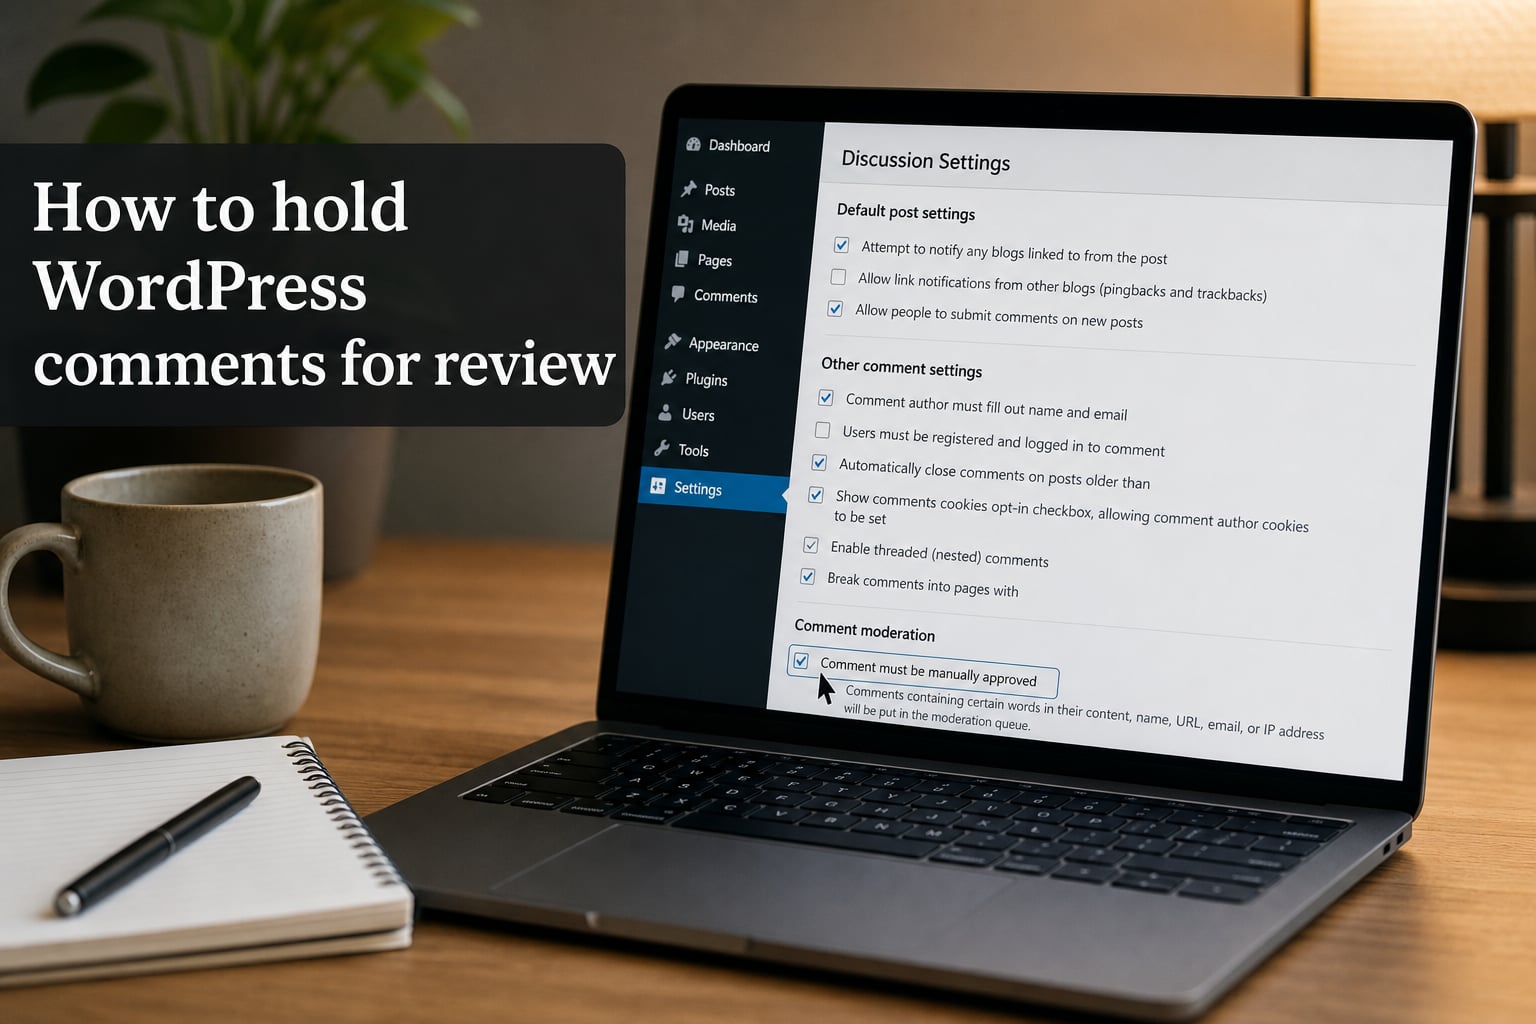
Comment moderation is one of the most important defenses your WordPress site has against spam, trolls, and low-quality contributions. If you run a blog or any site that accepts reader input, knowing how to hold WordPress comments for review gives you control over what appears publicly before a single visitor sees it. In this guide, I walk you through the exact settings, the moderation queue, email notifications, spam tools, and the workflow I use to keep discussions clean without spending hours each week.
I have managed WordPress comments across multiple sites over the years, and the difference between a comment section that builds trust and one that chases readers away almost always comes down to moderation settings. The good news is that WordPress has solid moderation tools built right in. You do not need a plugin just to hold comments for approval, and the setup takes about two minutes once you know where to look.
Here is everything you need to know to get comment moderation working the right way in 2026.
Table of Contents
- What Is WordPress Comment Moderation?
- How to Hold WordPress Comments for Review: Step-by-Step
- WordPress Discussion Settings Explained
- Comment Moderation Queue Overview
- How to Configure Email Notifications for Moderation
- How to Enable or Disable Comments Per Post or Page
- Spam Prevention: Comment Blacklist and Moderation Keys
- Comment Moderation Best Practices
- Plugin Alternatives for Advanced Comment Moderation
- FAQs
- Conclusion
What Is WordPress Comment Moderation?
WordPress comment moderation is the built-in system that lets you review, approve, edit, mark as spam, or delete comments before they appear on your site. When you hold WordPress comments for review, every new comment lands in a moderation queue instead of publishing instantly. Nothing goes live until you decide it should.
Think of the moderation queue as a waiting room. A visitor submits a comment, WordPress places it on hold, and you get a chance to read it first. This matters because unmoderated comment sections attract spam bots, promotional links, and occasionally offensive content that can damage your site’s credibility and even hurt your search rankings.
WordPress gives every comment one of four statuses. Understanding these statuses is the foundation for everything else in this guide:
Pending: The comment is waiting in the moderation queue for your review. It is not visible to visitors.
Approved: You have reviewed and approved the comment. It now appears on your post or page.
Spam: The comment has been flagged as spam. It stays hidden and can be deleted in bulk later.
Trash: The comment is deleted but remains recoverable for 30 days before permanent removal.
These four statuses appear as filter tabs at the top of the Comments screen in your WordPress dashboard. I reference them constantly when managing large comment volumes.
How to Hold WordPress Comments for Review: Step-by-Step
The fastest way to hold all WordPress comments for review is through the Discussion Settings screen. Here is the exact step-by-step process I follow every time I set up a new WordPress site.
Step 1: Log in to your WordPress dashboard. Go to yoursite.com/wp-admin and enter your username and password. You need an Administrator or Editor account to access the settings we are about to change.
Step 2: Navigate to Settings, then Discussion. In the left-hand admin menu, hover over Settings and click Discussion. This screen controls all global comment behavior on your site.
Step 3: Check the box labeled “Comment must be manually approved.” Scroll to the section titled Before a comment appears. You will see two checkboxes. Tick the first one, which reads “Comment must be manually approved.” This single setting holds every new comment in the moderation queue until you personally approve it.
Step 4: Optionally check “Comment author must have a previously approved comment.” This second checkbox lets returning commenters skip the queue if you already approved one of their comments before. I recommend starting with both boxes checked and then relaxing the second one once you trust your regulars.
Step 5: Click “Save Changes” at the bottom of the screen. Scroll to the bottom and hit the blue Save Changes button. Your settings take effect immediately. Every comment submitted from this point forward is held for your review.
That is the complete process. Once these settings are active, you will see a notification badge appear next to the Comments menu item in your dashboard whenever new comments are waiting.
WordPress Discussion Settings Explained
The Discussion Settings screen contains several toggles that affect how comments behave on your site. I have broken down the ones that matter most for holding comments for review.
Allow people to submit comments on new posts: This is the master switch for comments. When checked, comments are enabled globally on all new posts. Uncheck it to disable comments site-wide for future content. This does not affect existing posts.
Comment must be manually approved: The most important setting for this guide. When checked, every comment enters the pending queue regardless of who submitted it. No comment publishes without your explicit approval.
Comment author must have a previously approved comment: When checked alongside the manual approval box, first-time commenters are held for review while previously approved commenters get auto-approved. This reduces your moderation workload over time as your community grows.
Allow comment notifications: Sends you an email whenever a new comment is submitted. This works hand in hand with manual approval because it tells you something is waiting.
Enable threaded (nested) comments: Lets people reply to other replies, creating conversation threads. This does not affect moderation but changes how approved comments display.
Automatically close comments on posts older than X days: Closes commenting after a set number of days. Useful for cutting down spam on old posts that still rank in search results. I typically set this to 60 or 90 days.
Spend a few minutes reviewing each of these toggles. The right combination depends on your community size, how much spam you receive, and how much time you can dedicate to moderation.
Comment Moderation Queue Overview
Once you hold WordPress comments for review, the moderation queue becomes your command center. You access it by clicking Comments in the left-hand admin menu. Every pending comment waits here for your decision.
The Comments screen shows all comments across your site with filter tabs at the top. Click Pending to see only the comments waiting for approval. This filtered view is what I check first every morning and after every new post goes live.
For each pending comment, you can take five actions by hovering over the comment row:
Approve: Publishes the comment immediately so visitors can see it.
Reply: Lets you write a response that publishes alongside the approved comment.
Edit: Opens the comment editor so you can fix typos or remove a link before approving.
Spam: Marks the comment as spam and feeds data to your spam filter.
Trash: Moves the comment to the trash bin for later permanent deletion.
You can also use the bulk actions dropdown to approve, mark as spam, or move to trash for multiple comments at once. Check the boxes next to the comments you want to act on, select an action from the dropdown, and click Apply. This bulk approach saves serious time when you have a backlog.
I recommend clearing your pending queue daily if your site gets moderate traffic. Comments that sit unapproved for days make the commenter feel ignored and reduce the chance they engage again.
How to Configure Email Notifications for Moderation
Email notifications keep you informed the moment a comment needs your attention. WordPress can send two types of comment emails, and both are configured in the same Discussion Settings screen.
Step 1: Go to Settings, then Discussion. Navigate to the same screen you used to enable manual approval.
Step 2: Locate the “E-mail me whenever” section. Near the top of the settings page, you will find two checkboxes under this heading.
Step 3: Check “Anyone posts a comment.” This sends you an email every time a comment is submitted, whether or not it requires approval. It is useful when you want to know about all activity.
Step 4: Check “A comment is held for moderation.” This is the key notification for our purposes. You only get an email when a comment lands in the moderation queue. If you enabled manual approval, this means you hear about every new comment that needs your review.
Step 5: Scroll down to the moderation email address field. In older WordPress versions, there is a field where you can enter one or more email addresses to receive moderation notices. In current versions, notifications go to the site administrator email set under Settings, then General.
Step 6: Click “Save Changes.” Your notification preferences are now active.
With these settings, you will get an email the instant a comment is held for review. Each email includes a direct link to approve, spam, or trash the comment, so you can moderate from your inbox without even logging into the dashboard.
How to Enable or Disable Comments Per Post or Page
Global settings are a great starting point, but sometimes you want different rules for individual posts. WordPress lets you override the global discussion settings on a per-post basis.
To control comments on a single post or page: Open the post in the block editor and look for the Discussion panel in the right sidebar. If you do not see it, click the three dots at the top right, select Preferences, then Panels, and enable Discussion. From there you can toggle Allow comments on or off for that specific post.
In the classic editor: The Discussion meta box appears below the content area. Check or uncheck Allow comments to override the global setting for that post.
To bulk-enable or disable comments: Go to the Posts list in your dashboard, select the checkboxes next to the posts you want to change, then choose Edit from the bulk actions dropdown and click Apply. Set the Comments dropdown to Allow or Do not allow and click Update.
This per-post control is helpful when you want comments open on your latest blog posts but closed on a landing page or a sensitive announcement.
Spam Prevention: Comment Blacklist and Moderation Keys
Holding comments for review is powerful, but you can reduce the noise reaching your queue with WordPress’s built-in spam filtering. The Discussion Settings screen includes tools that automatically flag or block suspicious comments.
Comment Moderation list: This field lets you enter words, IP addresses, or email addresses that force a comment into the moderation queue even if you have auto-approval enabled. Enter one item per line. When a comment contains any of these terms in its content, name, URL, email, or IP address, WordPress holds it for your review instead of publishing it.
Disallowed Comment List (formerly Comment Blacklist): This field works one level above the moderation list. Any comment matching items on this list is immediately marked as spam and never appears in your pending queue at all. Use it for persistent spammers, known bad IP addresses, and offensive terms you never want to see.
Hold a comment in the queue if it contains X or more links: This setting catches one of the most common spam tactics, which is stuffing comments with links. The default is two links. If a comment includes more links than your threshold, WordPress holds it for review. I keep mine set to two because legitimate comments rarely include more.
Comment maxlength and other filters: While not in the default Discussion Settings, some themes and hosts add extra filtering. The combination of the moderation list, the blacklist, and the link threshold catches the vast majority of automated spam before it reaches your eyes.
I also recommend pairing these settings with Akismet, the spam-filtering plugin that ships bundled with WordPress. Akismet checks each comment against a global database of known spam patterns and automatically flags suspicious ones. It dramatically reduces the number of items in your moderation queue.
Comment Moderation Best Practices
Settings are only half the equation. How you actually use the moderation queue determines whether your comment section thrives or becomes a chore. Here are the practices I have refined over years of managing WordPress sites.
Approve comments quickly. When someone takes the time to leave a thoughtful comment, a fast approval signals that you value their input. Aim to review pending comments within 24 hours, and ideally within a few hours during active periods. Long delays discourage repeat engagement.
Set a clear comment policy. Publish a short policy on your site explaining what is and is not acceptable. Reference it when you delete or mark comments as spam. A written policy keeps your moderation consistent and gives you something to point to when a commenter pushes back.
Use the bulk moderation tools. When spam arrives in waves, do not handle it one comment at a time. Filter by Pending or Spam, select multiple items, and use bulk actions to clear them in seconds. This is especially useful after a spam bot finds your site.
Reply to good comments. Moderation is not just about filtering out the bad. Replying to approved comments builds community and encourages others to participate. Use the Reply action directly in the moderation queue so your response publishes with the comment.
Mark spam as spam, do not just delete it. When you mark a comment as spam instead of trashing it, you help WordPress and Akismet learn. Over time, similar comments get auto-flagged and your manual workload drops.
Close comments on old posts. Old posts attract disproportionate spam because automated bots find them through search results. Use the auto-close setting to disable comments on posts older than 60 or 90 days, which cuts your moderation volume significantly.
Review your blacklist periodically. Spam patterns change. Add new terms as you encounter them and remove entries that are no longer relevant. A well-maintained blacklist keeps your queue focused on genuine comments.
Plugin Alternatives for Advanced Comment Moderation
The built-in WordPress moderation tools handle most needs, but some sites need more. If you are dealing with high comment volumes, recurring spam attacks, or want features like comment upvoting, several plugins extend WordPress moderation without replacing it.
Akismet: The standard spam filter, bundled with WordPress. It checks comments against a global spam database and auto-flags the obvious junk. It works alongside your manual approval settings, so held comments still wait for your review but clear spam gets filtered first.
Anti-Spam Bee: A free alternative to Akismet that uses local checks rather than a remote database. It blocks spam without sending comment data to third-party servers, which appeals to privacy-focused site owners.
wpDiscuz: Replaces the default comment form with a richer interface that includes threaded replies, social login, and inline moderation tools. Forum discussions on Reddit frequently recommend wpDiscuz for site owners who want more engagement features while keeping full moderation control.
These plugins layer on top of your existing Discussion Settings. You still hold comments for review using the same steps I outlined above. The plugins just add filtering power and interface improvements.
FAQs
How do I hold all comments for review in WordPress?
Go to Settings, then Discussion in your WordPress dashboard. Check the box labeled Comment must be manually approved and click Save Changes. Every new comment will now be held in the moderation queue until you approve it.
How to manage comments in WordPress?
Click Comments in the left-hand admin menu to open the moderation queue. Use the filter tabs to view Pending, Approved, Spam, or Trashed comments. Hover over any comment to approve, reply, edit, spam, or trash it, or use the bulk actions dropdown to handle multiple comments at once.
How to automatically approve comments on WordPress?
Go to Settings, then Discussion and uncheck Comment must be manually approved. You can also check Comment author must have a previously approved comment so that returning visitors get auto-approved while first-time commenters are still held for review.
Where are WordPress comment moderation settings located?
Comment moderation settings live under Settings, then Discussion in the WordPress admin dashboard. This screen controls manual approval, email notifications, spam filtering, threaded comments, and auto-closing of comments on old posts.
Will holding comments for review affect my SEO?
No. Holding comments for review does not negatively affect SEO. In fact, moderating comments can improve SEO by preventing spam links and low-quality content from appearing on your pages.
Conclusion
Learning how to hold WordPress comments for review is one of the highest-value settings you can configure on your site. A single checkbox in the Discussion Settings screen puts you in full control of what your visitors see, protecting your reputation and keeping spam off your pages.
Start by enabling manual approval, turning on moderation email notifications, and adding a few known spam terms to your blacklist. Then build a daily habit of clearing the pending queue so good comments go live fast. These steps take minutes to set up and save you hours of cleanup down the road.