
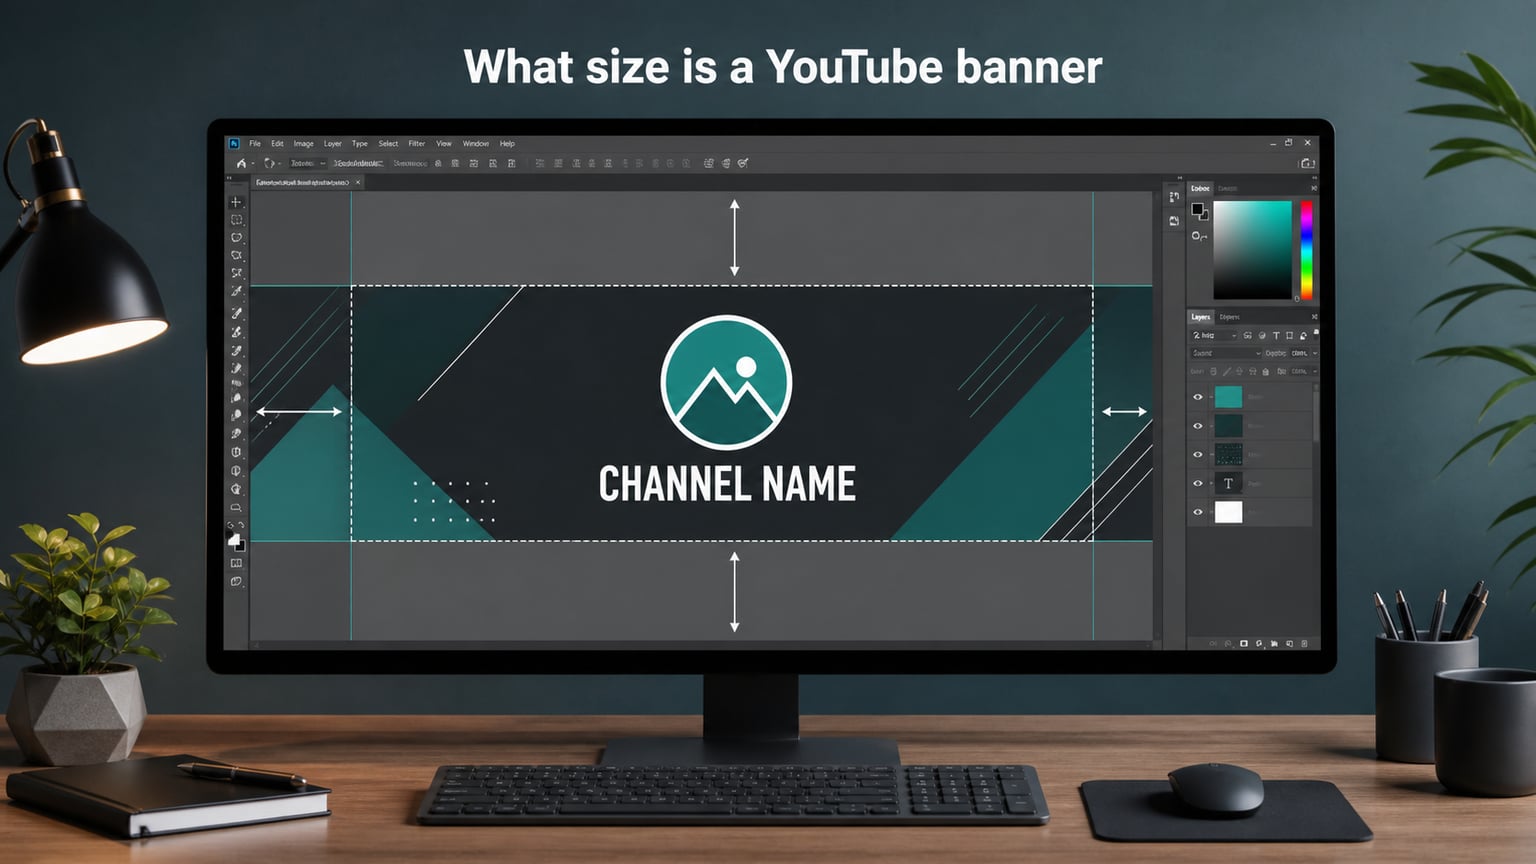
The recommended YouTube banner size is 2560 x 1440 pixels. That single image gets cropped and resized automatically by YouTube to fit every screen your visitors use, from a massive smart TV down to a phone in portrait mode.
But here is where most creators get tripped up. Only the center portion of that image, called the safe zone, is guaranteed to be visible on every device. That safe area measures 1235 x 338 pixels. Everything outside it will be cut off on at least one type of screen.
If you have ever uploaded a banner and found your logo missing on mobile, or your text sliced in half on desktop, you already know how frustrating this can be. I have been there myself, and after redoing channel art more times than I care to admit, I learned that getting the dimensions right from the start saves hours of trial and error.
In this guide, I will walk you through every YouTube banner dimension you need, explain the safe zone in plain language, and show you how to create and upload a banner that looks sharp on every device. Whether you are starting a new channel or fixing a banner that keeps getting cropped, you will find the exact specifications here.
Table of Contents
- Quick Answer: YouTube Banner Size at a Glance
- YouTube Banner Dimensions Explained
- Understanding the YouTube Banner Safe Zone
- How Your Banner Looks on Different Devices
- File Format and Size Requirements
- How to Make a YouTube Banner That Fits
- How to Upload Your YouTube Banner
- Common YouTube Banner Mistakes and How to Fix Them
- YouTube Banner Size FAQs
- What size is a YouTube banner in pixels?
- What is the aspect ratio of a YouTube banner?
- What is the safe zone for a YouTube banner?
- What file format should a YouTube banner be?
- What is the maximum file size for a YouTube banner?
- Can I use the same banner for desktop and mobile?
- Why does my YouTube banner look different on mobile?
- What is the minimum YouTube banner size?
- Final Thoughts on YouTube Banner Sizing
Quick Answer: YouTube Banner Size at a Glance
Here are the numbers you came here for, all in one place:
Recommended banner size: 2560 x 1440 pixels (16:9 aspect ratio)
Minimum image size: 2048 x 1152 pixels
Safe zone (visible on all devices): 1235 x 338 pixels
Maximum file size: 6 MB
Accepted file formats: JPG, PNG, GIF, and BMP
The full 2560 x 1440 image is what YouTube stores. The 1235 x 338 safe zone is the horizontal strip in the center where you should place your logo, channel name, and any text. Everything above and below that strip will be visible on TV and desktop but completely invisible on mobile devices.
YouTube Banner Dimensions Explained
YouTube uses a single banner image and crops it dynamically based on the viewer’s screen. This means you are not uploading separate files for desktop, mobile, and TV. You upload one large image and YouTube does the math.
The recommended size of 2560 x 1440 pixels matches a standard 16:9 widescreen aspect ratio. This is the same ratio used by HDTVs, most monitors, and YouTube’s own video player. YouTube chose this ratio because the banner needs to fill an entire TV screen when someone views your channel on a smart TV app.
If you cannot create an image that large, YouTube accepts a minimum dimension of 2048 x 1152 pixels. Anything smaller than that will be rejected or look blurry when stretched. I recommend always designing at the full 2560 x 1440 resolution to give YouTube the highest quality source image to work with.
Why the Aspect Ratio Matters
The 16:9 aspect ratio is not arbitrary. It is the universal widescreen standard, which means your banner will fill the screen edge to edge on TVs and most desktop monitors without any black bars or distortion.
Here is the simple math: for every 16 pixels of width, you need 9 pixels of height. At the recommended resolution, that ratio is 2560 divided by 1440, which equals exactly 1.778. Divide 16 by 9 and you get the same number. This consistency is why the image scales cleanly across devices without stretching or squishing.
Some creators try to use square or vertical images, thinking they will look better on mobile. This almost always backfires because YouTube expects that 16:9 source ratio. A non-standard shape will be padded, stretched, or cropped in ways you did not intend.
Understanding the YouTube Banner Safe Zone
The safe zone is the single most important concept in YouTube banner design. It is a horizontal strip measuring 1235 x 338 pixels, centered horizontally and vertically within the full 2560 x 1440 image.
Think of it as the only area you can fully trust. Any text, logo, or important visual element placed inside this strip will be visible on every device YouTube runs on. Anything placed outside this strip will be cropped on at least one type of screen.
YouTube itself highlights this zone in its banner upload preview within YouTube Studio. When you upload an image, you will see a shaded area showing exactly what mobile users will see. I always recommend checking that preview before saving.
What Gets Cropped Outside the Safe Zone
Here is what happens to the areas outside the safe zone on different devices:
Above the safe zone: Visible on TV and desktop, completely cropped on mobile and tablet
Below the safe zone: Visible on TV and desktop, cropped on mobile and tablet
Far left and far right of the safe zone: Cropped on desktop and mobile, only fully visible on TV
Inside the safe zone: Always visible, guaranteed, on every device
This is why forum users on Reddit’s YouTube communities constantly complain about banners looking wonky. They placed their channel name or logo near the top or bottom edge, only to discover it vanishes on phones.
The Web-Safe Area: 1546 x 423 Pixels
You will sometimes see a second dimension mentioned: 1546 x 423 pixels. This is the web-safe area, which is the portion of the banner visible on standard desktop browsers. It is larger than the mobile safe zone but smaller than the full image.
The 1546 x 423 area is useful if you want to place a secondary element, like a social media handle or a tagline, that will show up on desktop but not necessarily on mobile. Just remember the 1235 x 338 zone is your absolute safe bet for anything critical.
How Your Banner Looks on Different Devices
YouTube serves your channel page on a wide range of screens, and each one crops the banner differently. Understanding these differences helps you design strategically so your banner looks intentional everywhere.
Desktop Display: 2560 x 423 Pixels
On a standard desktop browser, YouTube shows a horizontal strip of your banner. The visible area is roughly 2560 x 423 pixels for wide monitors, though the exact width varies with the browser window size. The height stays fixed at about 423 pixels on most displays.
This means desktop viewers see a wide, short band across the top of your channel. They see more width than mobile users but the same limited height. The web-safe area of 1546 x 423 is the portion guaranteed to be visible even on smaller laptop screens.
Mobile Display: 1546 x 423 Pixels (Cropped to 1235 x 338)
On mobile phones, the banner gets cropped significantly. YouTube displays the center of your image at roughly 1235 x 338 pixels in portrait mode. The top and bottom portions are completely removed.
This is the tightest crop of any device. If your logo sits 100 pixels above the safe zone, mobile users will never see it. This is the number one reason banners look broken on phones.
Tablet Display
Tablets show slightly more than phones but less than desktops. The visible area falls somewhere between the mobile and desktop crops, depending on the tablet’s screen resolution and orientation. Portrait mode crops more aggressively than landscape.
You cannot control exactly how a tablet renders your banner, which is another reason to keep all critical content within the 1235 x 338 safe zone.
TV Display: Full 2560 x 1440 Pixels
Smart TVs are where your full banner shines. The YouTube app on TV displays the entire 2560 x 1440 pixel image, filling the screen completely. This is the only device where the top and bottom areas of your banner are fully visible.
If you want to include a larger design element, like a full background image or pattern, TV viewers will see all of it. Just make sure that background does not compete with the critical content in the safe zone, since most of your audience will be on mobile or desktop.
File Format and Size Requirements
YouTube accepts four image file formats for channel banners: JPG, PNG, GIF, and BMP. Each has its strengths, and choosing the right one affects how your banner looks after compression.
Which Format Should You Use?
PNG: Best for banners with text, logos, or sharp edges. Supports transparency and preserves crisp lines.
JPG: Best for photographic backgrounds. Smaller file size but can introduce artifacts around text and logos.
GIF: Acceptable but limited to 256 colors. Not recommended for detailed designs.
BMP: Technically supported but produces very large files with no quality advantage over PNG.
For most creators, I recommend PNG. It handles text and logos cleanly, does not blur edges like JPG can, and stays under the file size limit for typical banner designs.
File Size Limit: 6 MB
The maximum file size YouTube allows for a banner is 6 MB. Most well-optimized PNG or JPG banners come in well under that limit, typically between 500 KB and 2 MB.
If your file exceeds 6 MB, it is usually because you saved it at an unnecessarily high resolution or used an uncompressed format. Exporting at exactly 2560 x 1440 pixels and using PNG compression or JPG quality of 85 to 90 percent will keep the file small without visible quality loss.
Resolution and Image Quality
Always design at the full 2560 x 1440 resolution, even if the final file is compressed. Starting with a high-resolution canvas means your text stays sharp and your images remain crisp when YouTube resizes the banner for different screens.
Use vector elements for logos and text where possible. If you are working in a raster-based tool, set your canvas to at least 150 DPI equivalent to avoid pixelation. Avoid upscaling a smaller image to 2560 x 1440, since that produces a blurry result.
How to Make a YouTube Banner That Fits
Creating a banner that looks right on every device comes down to a simple principle: put your critical content in the center and treat the rest as background. Here is my step-by-step approach.
Step 1: Set Up Your Canvas
Create a new document at exactly 2560 x 1440 pixels. This is your full banner size. If your design tool offers a YouTube banner template, use it, since many include built-in safe zone guides.
Step 2: Mark Your Safe Zone
Draw a rectangle in the center of your canvas measuring 1235 x 338 pixels. This rectangle should be centered both horizontally and vertically. Everything inside this box is guaranteed visible on every device.
Many design tools let you add guide lines. Place guides at the edges of this rectangle so you can see your safe boundaries while working. Once your design is finished, delete or hide the rectangle before exporting.
Step 3: Place Critical Elements in the Safe Zone
Put your logo, channel name, tagline, and any call-to-action text entirely within the safe zone. This is non-negotiable. If any part of these elements extends past the safe zone boundaries, it will be cropped on mobile.
Center your most important element, typically your logo or channel name, in the exact middle of the safe zone. This ensures it stays balanced no matter how the image is cropped.
Step 4: Fill the Background
Use the full 2560 x 1440 canvas for your background, patterns, or decorative elements. These areas will only be fully visible on TV, but they give your banner a polished, intentional look rather than a floating logo on white space.
Choose a background that contrasts with your safe zone content. A busy background behind your logo makes it hard to read. Consider using a subtle gradient, a solid brand color, or a darkened photo that lets your text pop.
Step 5: Export and Check
Export your banner as a PNG or JPG file. Before uploading, open it in an image viewer and mentally crop it to the safe zone dimensions. If the center strip looks good on its own, your banner is ready.
Design Tools That Make This Easier
Several free and paid tools offer YouTube banner templates with built-in safe zone guides:
Canva: Free YouTube banner template with safe zone overlay. Drag-and-drop interface, great for beginners.
Snappa: Pre-sized YouTube banner canvas with visible safe area markers.
Photopea: Free browser-based Photoshop alternative. Set canvas to 2560 x 1440 and add manual guides.
GIMP: Free desktop editor. Create guides at the safe zone boundaries for precise placement.
Adobe Photoshop: Professional option with full control over guides, layers, and export settings.
If you want to keep things simple, start with Canva or Snappa. Their templates already account for the safe zone, so you can focus on design rather than math.
How to Upload Your YouTube Banner
Once your banner is designed and exported, uploading it takes about a minute. Here is the exact process in YouTube Studio.
Step 1: Open YouTube Studio
Go to studio.youtube.com and sign in to your account. If you manage multiple channels, make sure you have the correct one selected from the channel switcher in the top right corner.
Step 2: Navigate to Customization
In the left sidebar, click on Customization. This opens the channel customization panel where you can edit your channel layout, branding, and basic info.
Step 3: Go to the Branding Tab
Click the Branding tab at the top of the customization panel. You will see three sections: profile picture, banner image, and video watermark.
Step 4: Upload Your Banner
Click the Upload button in the Banner Image section. Select your exported PNG or JPG file from your computer. YouTube will process the image and show you a preview of how it appears on different devices.
Step 5: Check the Preview
YouTube displays three previews: TV, desktop, and mobile. Check all three carefully. If your logo or text is missing in the mobile preview, your elements are outside the safe zone. Go back to your design tool, move them inward, and re-upload.
Step 6: Publish
Click Publish in the top right corner of the customization panel. Your banner is now live. Changes typically appear within a few minutes, though cached versions may take longer to update for returning visitors.
Common YouTube Banner Mistakes and How to Fix Them
After helping dozens of creators fix their channel art, I see the same problems come up repeatedly. Here are the most common mistakes and exactly how to solve each one.
Mistake 1: Text or Logo Missing on Mobile
The problem: Your banner looks perfect on desktop but your logo vanishes on your phone.
The fix: Your critical elements are outside the 1235 x 338 safe zone. Open your design file, move your logo and text entirely inside the safe zone boundaries, and re-export. When in doubt, center everything.
Mistake 2: Banner Looks Blurry or Pixelated
The problem: The image looks soft or low-quality, especially on larger screens.
The fix: You either started with a low-resolution image or upscaled a smaller design. Always create your banner at the full 2560 x 1440 pixel resolution. If you used a 720p image and stretched it, rebuild the design at the correct size.
Mistake 3: File Too Large to Upload
The problem: YouTube rejects your image because it exceeds the 6 MB file size limit.
The fix: If you are using PNG, try exporting as JPG at 85 to 90 percent quality. If you are already using JPG, reduce the quality slightly or flatten your image before exporting. Remove any unnecessary layers or hidden elements that bloat the file.
Mistake 4: Important Content Sliced by Cropping
The problem: Your tagline or secondary text gets cut in half when viewed on a laptop.
The fix: You placed content in the web-safe area (1546 x 423) but not the mobile safe zone (1235 x 338). Content in this middle ring shows on desktop but not mobile. Either move it into the inner safe zone or treat it as desktop-only decorative text.
Mistake 5: Conflicting Dimensions from Different Sources
The problem: You found five different websites listing five different banner sizes and do not know which to trust.
The fix: This is one of the most common frustrations on Reddit’s YouTube communities. The confusion comes from mixing up the full image size, the minimum size, the safe zone, and device-specific display crops. Trust the numbers in this guide: 2560 x 1440 for the full image, 2048 x 1152 minimum, and 1235 x 338 for the safe zone. These come directly from YouTube’s official specifications.
Mistake 6: Using a Non-Standard Aspect Ratio
The problem: You used a square or vertical image and it looks distorted or padded with blank space.
The fix: YouTube expects a 16:9 aspect ratio. Redesign your banner on a 2560 x 1440 canvas to match the widescreen format. Non-standard ratios will always render incorrectly.
YouTube Banner Size FAQs
What size is a YouTube banner in pixels?
The recommended YouTube banner size is 2560 x 1440 pixels. The minimum accepted size is 2048 x 1152 pixels. The safe zone, which is visible on all devices, measures 1235 x 338 pixels.
What is the aspect ratio of a YouTube banner?
A YouTube banner uses a 16:9 widescreen aspect ratio. This means for every 16 pixels of width, the image has 9 pixels of height. At the recommended size of 2560 x 1440 pixels, this ratio is maintained exactly.
What is the safe zone for a YouTube banner?
The safe zone is the center area of the banner measuring 1235 x 338 pixels. Any text, logo, or important element placed inside this zone is guaranteed to be visible on every device, including mobile phones, tablets, desktops, and TVs.
What file format should a YouTube banner be?
YouTube accepts JPG, PNG, GIF, and BMP formats. PNG is recommended for banners with text and logos because it preserves sharp edges. JPG works well for photographic backgrounds. Avoid BMP due to large file sizes.
What is the maximum file size for a YouTube banner?
The maximum file size for a YouTube banner is 6 MB. Most optimized PNG or JPG banners range from 500 KB to 2 MB. If your file exceeds 6 MB, reduce the export quality or flatten layers before uploading.
Can I use the same banner for desktop and mobile?
Yes, you upload one single banner image and YouTube automatically crops it for each device. However, only the center safe zone of 1235 x 338 pixels is guaranteed visible on both desktop and mobile. Always place your most important content within that zone.
Why does my YouTube banner look different on mobile?
Mobile devices crop the banner more aggressively than desktop or TV. Only the center 1235 x 338 pixel strip is shown on phones. If your logo or text sits outside this area, it will be invisible on mobile. Move all critical elements into the safe zone to fix this.
What is the minimum YouTube banner size?
The minimum accepted YouTube banner size is 2048 x 1152 pixels. However, designing at the full recommended size of 2560 x 1440 pixels gives YouTube a higher quality source image and produces sharper results on large screens.
Final Thoughts on YouTube Banner Sizing
Getting your YouTube banner size right comes down to three numbers: design at 2560 x 1440 pixels, keep nothing smaller than 2048 x 1152, and protect everything important inside the 1235 x 338 safe zone. Master those dimensions and your channel art will look professional on every screen.
The biggest mistake I see creators make is treating the banner as one flat image rather than a layered design with a protected center. Design the background for the full canvas, but treat the safe zone as a sacred space for your logo and message. Once that clicks, banner sizing stops being a frustration and becomes a simple checklist.
If you are ready to put this into practice, grab a template from Canva or Snappa, set your canvas to 2560 x 1440, mark your safe zone, and start designing. Your channel’s first impression is worth getting right.