
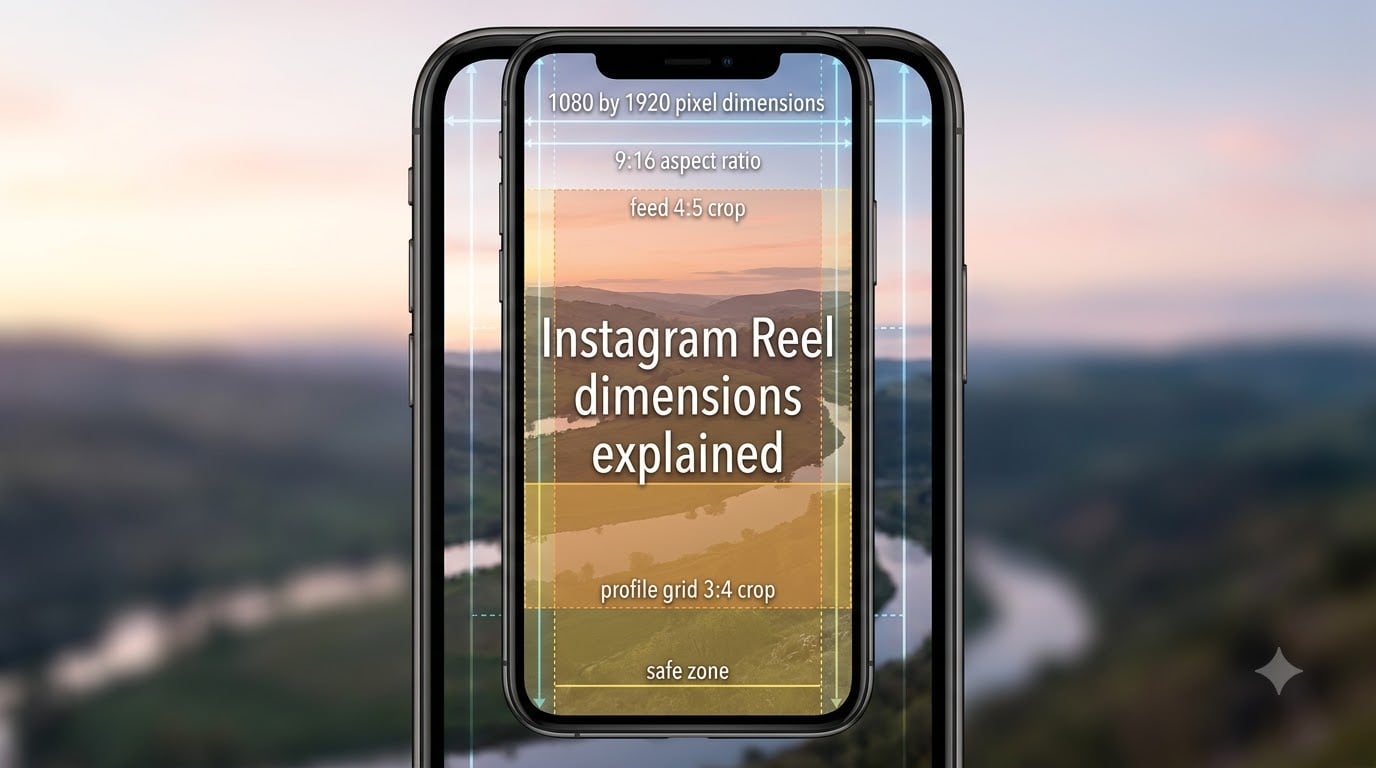
Instagram Reel dimensions are 1080 pixels wide by 1920 pixels tall, using a 9:16 aspect ratio designed for full-screen vertical viewing on mobile. If you upload a video in those exact dimensions, your Reel will play edge-to-edge in the Reels tab, fit the feed’s 4:5 crop cleanly, and look sharp on the profile grid.
I have been filming and editing Reels since the format launched, and I have watched three years of creators ask the same five questions: why is my Reel cropped, why is it blurry, why is there a black bar, what size is the cover image, and how do I export without losing quality. This guide answers all of them using the exact specs and pixel measurements I trust on every upload in 2026.
You will learn the core specs, the safe zones that protect your text and faces from Instagram’s UI overlays, the export settings that prevent compression blur, the cover image strategy that survives the profile grid, and how Reels compare to TikTok and YouTube Shorts if you repurpose content across platforms.
Table of Contents
- Instagram Reel Dimensions: Quick Answer
- How Instagram Reels Display Across Different Surfaces
- Safe Zones for Instagram Reels
- Instagram Reel Cover Image Size and Strategy
- Best Export Settings for Instagram Reels
- Instagram Reel Length: What Works Best
- Common Instagram Reel Mistakes and How to Fix Them
- Instagram Reels vs TikTok vs YouTube Shorts Dimensions
- Frequently Asked Questions
- What is the correct Instagram Reel aspect ratio?
- Why does my Instagram Reel look cropped in the feed?
- What size should my Instagram Reel cover image be?
- Why is my Reel blurry after uploading?
- Can I upload a horizontal video as an Instagram Reel?
- What is the maximum length for Instagram Reels?
- What resolution prevents quality loss after uploading?
- How do I prevent text from being cut off in Instagram Reels?
- Conclusion
Instagram Reel Dimensions: Quick Answer
The single most important number for any Reel is 1080 x 1920 pixels at a 9:16 aspect ratio. Everything else (codec, frame rate, bitrate) is fine-tuning around that canvas. Here is the full cheat sheet I reference before every upload.
| Specification | Recommended Value | Minimum Acceptable |
|---|---|---|
| Resolution | 1080 x 1920 pixels | 720 x 1280 pixels |
| Aspect ratio | 9:16 (vertical) | 4:5 (feed crop) |
| Video codec | H.264 (MP4) | H.265 (HEVC) |
| Audio codec | AAC, 44.1 kHz or 48 kHz | Stereo, 320 kbps |
| Frame rate | 30 fps | 24 fps |
| Bitrate | 8 to 12 Mbps | 5 Mbps |
| Color profile | sRGB | Rec. 709 |
| File format | MP4 or MOV | MP4 |
| File size | Under 4 GB | Under 1 GB recommended |
| Maximum length | 3 minutes (90 seconds for most visibility) | 15 seconds |
Two of these numbers come up more than any other. The 9:16 aspect ratio is what makes your Reel look native and full-screen on the Reels tab. The 1080 x 1920 resolution is the sweet spot for sharpness after Instagram’s re-encoding pipeline. Anything lower than 720 x 1280 will look soft because Instagram still compresses on top of your source file.
How Instagram Reels Display Across Different Surfaces
The same 9:16 Reel file behaves differently in three places inside Instagram. That is the single biggest source of confusion for new creators, and it is the reason the same video can look perfect in the Reels tab but broken in the feed.
Reels Tab: Full-Screen 9:16
When a viewer taps into the Reels tab or sees your Reel in Explore, Instagram fills the entire phone screen with the 9:16 frame. This is the only surface where your video is shown exactly as you uploaded it. The image fills edge to edge, with only thin overlays for the username, caption, audio track, and like/comment/share buttons covering the bottom third.
Feed: Center-Cropped to 4:5
In the main feed, Instagram crops your Reel to a 4:5 ratio (1080 x 1350 pixels) so it shares the same frame shape as a square photo or a portrait image. The top and bottom of your 9:16 video get trimmed, and the center 4:5 portion is shown. This is why creators see their text suddenly cut off in the feed: the safe zones from the Reels tab do not apply here.
Profile Grid: Cropped to 3:4
Your profile grid is the most aggressive crop. Instagram displays each Reel cover image at a 3:4 ratio (1080 x 1440 pixels). The same 9:16 video is cropped even tighter, leaving only the middle 3:4 strip visible. If your cover image has text at the top, it can disappear completely on the profile grid.
| Surface | Display Ratio | Visible Pixel Area | What Gets Cut |
|---|---|---|---|
| Reels tab | 9:16 | 1080 x 1920 | Nothing (full canvas) |
| Feed | 4:5 | 1080 x 1350 | Top and bottom |
| Profile grid | 3:4 | 1080 x 1440 | Top and bottom, more aggressive |
| Stories sharing | 9:16 | 1080 x 1920 | Edges (UI overlays) |
Design once, then check all three. I always preview a Reel in the Reels tab, the feed, and the profile grid before I publish. If a phrase or product appears in the trimmed regions, I move it into the central safe zone before going live.
Safe Zones for Instagram Reels
Safe zones are the parts of your 1080 x 1920 frame where text, faces, and key visuals stay visible no matter which surface Instagram displays them on. The two main threats are the Instagram UI overlays (like the username, caption, and music name) and the feed/grid crops that trim the top and bottom.
Based on real device testing across iPhone 12 through iPhone 15 and common Android models, here are the pixel measurements I trust. These are measured against the 1080 x 1920 canvas, not the cropped versions.
| Safe Zone | Pixel Range | What to Keep There |
|---|---|---|
| Top safe zone | 0 to 150 px | Empty space (avoids status bar and back button) |
| Bottom safe zone | 1620 to 1920 px | Empty space (avoids caption, audio, and action buttons) |
| Left side safe zone | 0 to 60 px | Empty or low-priority visuals |
| Right side safe zone | 1020 to 1080 px | Empty or low-priority visuals |
| Central safe zone | 250 to 1620 px vertical, 100 to 980 px horizontal | Critical text, faces, products, logos |
The central safe zone is roughly 880 px wide by 1370 px tall, centered in the canvas. Anything inside that area will remain visible on the Reels tab, the feed (4:5 crop), and the profile grid (3:4 crop). Place every important visual element inside this rectangle.
Why the Bottom 250 Pixels Matter Most
Instagram overlays the username, caption preview, audio track, and the row of action buttons (like, comment, share, remix) in the lower portion of the Reels tab. On most modern phones, this overlay covers roughly the bottom 250 to 300 pixels. If your call-to-action text, your logo, or a vital product label sits in that zone, viewers will never see it.
Why the Top 150 Pixels Are Often Overlooked
The top of the frame can also be covered by the status bar, the back arrow, and the “Reels” label on iOS. New creators often forget this and place title text at the very top. It looks clean in the editing app but gets clipped by the UI on real devices.
Side Safe Zones for Captions and Subtitles
If you auto-generate captions (using Instagram’s own tool or a third-party app), they often render at different x-coordinates depending on the phone’s aspect ratio. Keep important caption text inside the horizontal 100 to 980 px window so it does not get clipped on narrower screens.
Instagram Reel Cover Image Size and Strategy
The cover image is the static frame that appears in the Reels tab, your profile grid, and inside DMs. Instagram lets you pick one frame from your video or upload a custom image. The size and content of that cover image affects how someone decides to tap.
Cover Image Dimensions
Instagram recommends 1080 x 1920 pixels (the full 9:16 Reel frame) for the cover image, but the visible area on the profile grid is only 3:4. The safe strategy is to design a 1080 x 1920 cover where the critical visual sits in the middle 3:4 rectangle (1080 x 1440) and the top and bottom of the 9:16 image are treated as safe padding.
| Cover Spec | Value |
|---|---|
| Recommended size | 1080 x 1920 px |
| Visible in profile grid | 1080 x 1440 px (3:4 crop) |
| Visible in Reels tab | 1080 x 1920 px (full) |
| File format | JPG or PNG |
| Max file size | 8 MB |
| Recommended text size | Bold, ~60-80 px tall, centered |
Design Strategy for the Profile Grid
Your profile grid is a row of three 3:4 thumbnails. If your cover image is visually busy or has tiny text at the top, it will be unreadable at thumbnail size. The cover should contain one bold phrase, one face, or one product shot. Anything else competes with the next 25 Reels in your grid.
Custom Cover vs Auto-Selected Frame
Auto-selected frames often pick a blurry mid-action moment. Uploading a custom cover gives you full control. I prefer to upload a custom image for educational Reels (so the title is readable) and to use the auto-frame for entertainment Reels (so the moment feels organic).
Best Export Settings for Instagram Reels
The export settings decide whether your Reel arrives on Instagram looking the way it did in your editor. Most blurry uploads are not a filming problem, they are a codec and bitrate problem. Here is the export preset I use in 2026 for every Reel.
| Setting | Recommended Value | Why |
|---|---|---|
| Container | MP4 (H.264) | Widest compatibility, smallest size at high quality |
| Codec | H.264 (AVC) baseline or main | Instagram re-encodes anyway; H.265 wastes processing |
| Resolution | 1080 x 1920 | Matches upload target; avoids upscaling |
| Frame rate | 30 fps (24 fps for cinematic) | Anything above 60 fps gets downsampled |
| Bitrate | 8 to 12 Mbps (VBR, 2-pass) | Sharpens motion, prevents compression artifacts |
| Audio | AAC, 44.1 kHz, stereo, 320 kbps | Standard for mobile playback |
| Color profile | sRGB | Matches Instagram’s display pipeline |
| File size | Under 1 GB ideal | Speeds upload, reduces re-compression |
Why H.264 Beats H.265 for Reels
Instagram re-encodes every upload. If you export using H.265 (HEVC), Instagram’s server has to decode and re-encode it back to H.264 for delivery. That double conversion is what causes the muddy, smeary look some creators call “Instagram mush.” Exporting in H.264 skips the extra step and looks noticeably sharper.
Why Bitrate Matters More Than Resolution
A 1080 x 1920 Reel exported at 3 Mbps will look worse than a 720 x 1280 Reel exported at 10 Mbps. Bitrate controls how much detail is preserved per second of video. For talking-head Reels, 8 Mbps is enough. For fast motion, screen recordings, or product close-ups, push to 12 Mbps.
Enable High-Quality Uploads in Instagram
Inside the Instagram app, go to Settings > Account > Data Usage and turn on “Upload at highest quality.” This tells Instagram to skip extra compression on cellular data. Several creators reported on Reddit that this single setting reduced their blurry Reel complaints by half.
Instagram Reel Length: What Works Best
Instagram now allows Reels up to 3 minutes long, but the format rewards shorter content. The ideal length depends on what you are trying to accomplish. Here is the breakdown I share with my consulting clients.
| Use Case | Recommended Length | Why |
|---|---|---|
| Hooks and discovery | 7 to 15 seconds | Highest completion rate, best for new audiences |
| Educational tips | 30 to 60 seconds | Long enough to teach, short enough to rewatch |
| Product demos | 45 to 90 seconds | Balances depth with watch-through |
| Story-driven content | 60 to 90 seconds | Room for a setup, payoff, and CTA |
| Long-form interviews | 2 to 3 minutes | Used for niche audiences and watch-time optimization |
| Reposted TikToks | 21 to 34 seconds | Matches TikTok’s original sweet spot |
Watch-through rate (the percentage of viewers who finish the Reel) is one of the strongest signals in the algorithm. A 15-second Reel with a 90 percent watch-through will outrank a 90-second Reel with a 30 percent watch-through, even if the second one has more total views.
Loop-Friendly Editing for Short Reels
Editors who consistently hit 7-day and 30-day charts often structure short Reels so the ending frame matches the opening frame. This makes the loop seamless and increases rewatches, which the algorithm counts as additional views.
Common Instagram Reel Mistakes and How to Fix Them
Even with the right specs, a few common pitfalls will ruin a Reel. These are the ones I see most often, and the fixes I use on my own uploads.
Mistake 1: Reel Looks Blurry After Upload
This is almost always a bitrate or codec issue. Export at 8 to 12 Mbps in H.264, not H.265. Turn on “Upload at highest quality” in Instagram settings. Avoid uploading on weak Wi-Fi with the app still in background mode.
Mistake 2: Text Gets Cut Off at the Bottom
Your text is sitting in the bottom 250 pixels that Instagram overlays with caption and action buttons. Move text up into the central safe zone (250 to 1620 px vertical range).
Mistake 3: Black Bars on the Sides
You uploaded a horizontal or square video. Instagram will pillarbox anything that is not 9:16. Re-edit the video to 1080 x 1920 or accept a tighter crop using Instagram’s built-in “Adjust preview” tool.
Mistake 4: Cover Image Looks Wrong on the Profile Grid
Your cover design has text at the top or bottom of the 9:16 frame. The grid only shows the middle 3:4. Reposition your key visual into the central 3:4 strip (top 1440 px out of the 1920 px canvas) and re-upload.
Mistake 5: Reel Looks Different in Feed vs Reels Tab
That is normal behavior. The feed crops to 4:5 and the Reels tab shows full 9:16. Design with the 4:5 crop in mind by keeping your best content in the central 4:5 rectangle.
Mistake 6: Audio Out of Sync
Your source file had a variable frame rate (VFR). Instagram expects constant frame rate (CFR). Re-export at CFR 30 fps and re-upload.
Instagram Reels vs TikTok vs YouTube Shorts Dimensions
If you publish the same video across multiple platforms, here is how the specs compare. The core canvas is identical, but the safe zones and length limits differ.
| Platform | Aspect Ratio | Resolution | Max Length | Bottom Safe Zone |
|---|---|---|---|---|
| Instagram Reels | 9:16 | 1080 x 1920 | 3 minutes | ~250 px |
| TikTok | 9:16 | 1080 x 1920 | 10 minutes | ~340 px |
| YouTube Shorts | 9:16 | 1080 x 1920 | 60 seconds | ~280 px |
TikTok has the largest bottom safe zone because its UI overlays more buttons (like, comment, share, remix, sound). YouTube Shorts sits in the middle. If you design for TikTok’s bottom safe zone, your Reel will be safe on all three platforms.
Repurposing Workflow
Edit once at 1080 x 1920 with safe zones that respect TikTok’s worst case. Export as MP4 H.264, 10 Mbps, 30 fps. Upload to all three platforms. Adjust the audio track only if the licensing differs. This workflow saves me 2 to 3 hours per week on cross-posting.
Frequently Asked Questions
What is the correct Instagram Reel aspect ratio?
The correct Instagram Reel aspect ratio is 9:16, which means 1080 pixels wide by 1920 pixels tall. This vertical format fills the entire phone screen in the Reels tab and is the standard for all native Reels.
Why does my Instagram Reel look cropped in the feed?
Instagram crops Reels to a 4:5 ratio in the main feed so they share the same frame as photos. The top and bottom of your 9:16 video get trimmed, leaving only the central 4:5 rectangle visible. Keep important text and visuals inside the central safe zone to avoid cropping.
What size should my Instagram Reel cover image be?
Instagram recommends a cover image of 1080 x 1920 pixels at 9:16, but the profile grid only shows the middle 3:4 portion (1080 x 1440). Design your cover so the key visual sits in the central 3:4 strip to keep it visible across all surfaces.
Why is my Reel blurry after uploading?
Blurry Reels are usually caused by low bitrate or the wrong codec. Export at 8 to 12 Mbps in H.264 (not H.265), turn on Upload at highest quality in Instagram settings, and avoid weak Wi-Fi during upload. A 1080 x 1920 source at 10 Mbps should stay sharp.
Can I upload a horizontal video as an Instagram Reel?
Yes, but Instagram will add black bars (pillarbox) to the sides to fit the 9:16 frame. For a full-screen look, re-edit the horizontal video to 1080 x 1920 vertical or use Instagram’s built-in Adjust preview tool to crop into the 9:16 canvas.
What is the maximum length for Instagram Reels?
Instagram Reels can be up to 3 minutes long. However, Reels between 7 and 30 seconds tend to get the highest completion rates and the most reach. Use longer Reels for educational or story-driven content, and shorter Reels for discovery and hooks.
What resolution prevents quality loss after uploading?
Export at 1080 x 1920 pixels with a bitrate of 8 to 12 Mbps. This gives Instagram enough detail to work with during its re-encoding. Combined with the H.264 codec and the high-quality upload setting, this resolution holds up across the Reels tab, feed, and profile grid.
How do I prevent text from being cut off in Instagram Reels?
Keep all important text inside the central safe zone (roughly 250 to 1620 px vertical and 100 to 980 px horizontal on a 1080 x 1920 canvas). This area survives the feed’s 4:5 crop, the profile grid’s 3:4 crop, and Instagram’s bottom UI overlays in the Reels tab.
Conclusion
Instagram Reel dimensions explained simply: 1080 x 1920 pixels at a 9:16 aspect ratio, exported as H.264 at 8 to 12 Mbps, with all critical text and visuals inside the central safe zone. Use 1080 x 1920 for the cover image but design key elements in the middle 3:4 strip so the profile grid crop stays clean.
Before you post your next Reel in 2026, run through this checklist: 1080 x 1920 source, H.264 codec, 30 fps, 10 Mbps bitrate, sRGB color, custom cover with safe text placement, and “Upload at highest quality” enabled in Instagram settings. That single workflow fix has solved more cropping and blur issues for my clients than any other change we have made.