
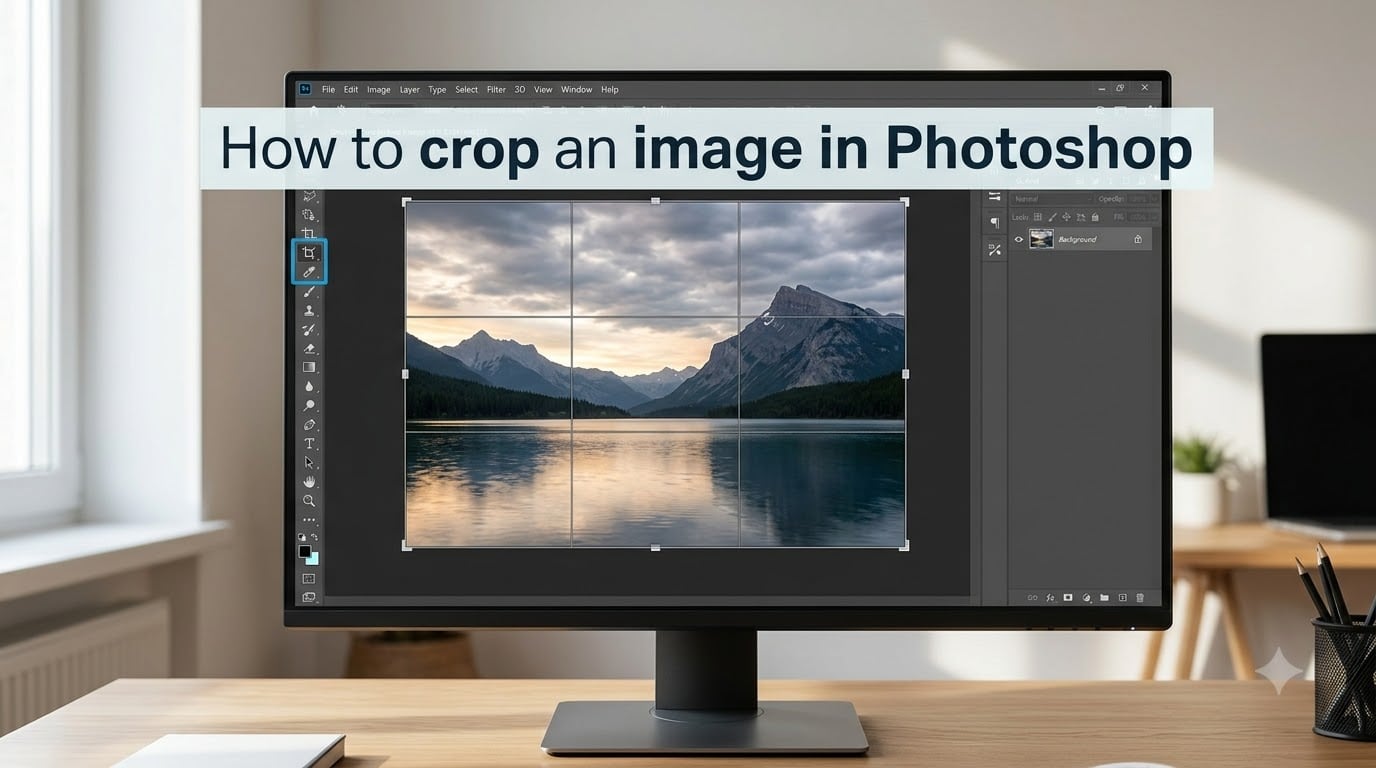
Cropping is one of the first skills every Photoshop user needs to learn, and it is also one of the most powerful composition tools in the software. Whether you are removing distractions from the edge of a photo, preparing a header image for your website, or fitting a picture into a specific aspect ratio for social media, the Crop Tool handles all of it. Our team has spent years editing images in Photoshop for web design projects, and we have tested every cropping method Photoshop offers to put together this guide.
In this article, you will learn how to crop an image in Photoshop using the Crop Tool, set precise aspect ratios, straighten tilted horizons, crop non-destructively, and troubleshoot the most common problems beginners face. We cover keyboard shortcuts, composition overlays, single-layer cropping, and advanced tools like the Perspective Crop Tool so you walk away with a complete understanding of every option available.
Table of Contents
- How to Crop an Image in Photoshop: Quick Answer
- Step 1: Select the Crop Tool
- Step 2: Adjust the Crop Border with Handles
- Step 3: Set an Aspect Ratio or Crop Preset
- Step 4: Commit or Cancel the Crop
- How to Straighten an Image While Cropping
- Non-Destructive Cropping in Photoshop
- Crop Overlays: Rule of Thirds, Golden Ratio, and More
- How to Crop a Single Layer Without Affecting Others
- Perspective Crop Tool: Fixing Tilted Lines
- Crop Tool vs Canvas Size vs Frame Tool
- Photoshop Crop Tool Keyboard Shortcuts
- Common Crop Problems and How to Fix Them
- FAQs
- Wrapping Up: You Now Know How to Crop an Image in Photoshop
How to Crop an Image in Photoshop: Quick Answer
If you need the short version right now, here is the fastest way to crop an image in Photoshop. Open your image, then follow these four steps:
Select the Crop Tool by pressing C on your keyboard or clicking the Crop Tool icon in the left toolbar. A cropping border appears around your entire image.
Drag the corner or edge handles inward to define the area you want to keep. You can also click and drag inside the border to reposition the image within the crop frame.
Set an aspect ratio in the options bar at the top if you need a specific proportion like 1:1 or 16:9. Leave it set to Ratio with no values entered for a free-form crop.
Press Enter on Windows or Return on Mac to apply the crop. Press Esc to cancel and discard your changes.
That is the entire core process. The rest of this guide dives deeper into each step and covers the advanced features that give you more control.
Step 1: Select the Crop Tool
The Crop Tool lives in the left-hand toolbar, and it is one of the easiest tools to reach with a keyboard shortcut. Press C on your keyboard to activate it instantly. You can also click the Crop Tool icon, which looks like two overlapping right angles forming a square.
When you select the Crop Tool, Photoshop automatically places a cropping border around your entire image. This border has visible handles on each corner and along each edge. You will also notice the options bar at the top of the screen fills with cropping-specific settings, including aspect ratio presets, a Straighten button, overlay options, and the Delete Cropped Pixels checkbox.
One important thing to know: your image layer does not need to be unlocked to use the Crop Tool. Unlike many other tools in Photoshop, cropping works on locked background layers without any extra steps. This is a detail that trips up beginners who assume they need to prepare the layer first.
If the Crop Tool is not visible in the toolbar, it may be nested behind the Perspective Crop Tool or the Slice Tool. Click and hold the tool icon to reveal the fly-out menu and select the standard Crop Tool from the list.
Step 2: Adjust the Crop Border with Handles
Once the cropping border appears, you have full control over what stays and what gets trimmed. Drag any corner handle inward to shrink the crop area from that direction. Drag any edge handle to crop from just one side.
Corner handles are what most people use because they adjust two sides at once. If you want to crop symmetrically from the center outward, hold Alt on Windows or Option on Mac while dragging a handle. This resizes the border from the center point rather than the opposite edge.
To reposition the image inside the crop border, simply click anywhere inside the border and drag. The image moves while the cropping frame stays put. This is especially useful when you have already set an aspect ratio and want to fine-tune which part of the photo falls within the frame.
If you have an aspect ratio set and you drag a corner handle, the border maintains its proportions automatically. To freely resize without any constraint, click the Clear button in the options bar to remove any active ratio before dragging.
Step 3: Set an Aspect Ratio or Crop Preset
The aspect ratio setting in the options bar determines the shape of your cropped image. Photoshop includes built-in presets for common ratios, and you can enter custom values for any project.
Click the ratio dropdown in the options bar to see presets like 1:1 (square), 4:5 (portrait), 16:9 (widescreen), 2:3, and 3:2. Select any preset and the cropping border snaps to that proportion immediately. This is the fastest way to prepare images for specific platforms.
For precise dimensions, type values directly into the Width, Height, and Resolution fields in the options bar. For example, entering 1200 px width, 630 px height, and 72 pixels per inch gives you the exact dimensions for an Open Graph header image. Always include the unit abbreviation (px, in, cm) so Photoshop interprets your values correctly.
To crop freely without any locked ratio, click the Clear button next to the ratio fields. This removes all constraints and lets you drag the border into any rectangular shape you want. Many forum users ask how to freely crop without maintaining a ratio, and this Clear button is the answer.
If you are preparing images for social media, knowing the right dimensions matters. For example, the Instagram profile picture size is 320 by 320 pixels displayed at 1:1, and you can set that exact ratio using the preset or manual entry method above.
Step 4: Commit or Cancel the Crop
After you have positioned the cropping border exactly where you want it, you need to apply the crop to finalize the change. Press Enter on Windows or Return on Mac to commit the crop.
You can also commit by clicking the checkmark icon in the options bar at the top of the screen. To cancel the crop and return your image to its original state, press Esc or click the X icon next to the checkmark.
If you applied a crop and immediately regret it, press Ctrl+Z on Windows or Cmd+Z on Mac to undo. Photoshop supports multiple undos, so you can step back through several actions if needed. For a non-permanent workflow that lets you adjust the crop at any point in the future, see the non-destructive cropping section below.
How to Straighten an Image While Cropping
The Crop Tool includes a built-in straightening feature that fixes tilted horizons and crooked architecture. You do not need to switch to a different tool.
With the Crop Tool active, click the Straighten button in the options bar. Then click and drag across your image along a line that should be level, such as the horizon or a building edge. Photoshop automatically rotates the image and adjusts the crop border to straighten that line.
You can also skip the Straighten button entirely. Just move your cursor outside the cropping border, then click and drag to rotate the image manually. A grid overlay appears to help you align elements visually.
One drawback of straightening is that the rotation creates empty triangular areas in the corners of your image. By default, Photoshop fills these with your background color, which often shows up as white or transparent. To avoid this, enable Content-Aware Fill from the crop options. Photoshop will intelligently fill those empty edges with content sampled from your image, preserving the full frame without white gaps.
Non-Destructive Cropping in Photoshop
By default, Photoshop permanently deletes the pixels outside your crop area when you apply the crop. This is called destructive cropping, and it means you cannot recover those pixels later if you change your mind. Lightroom users switching to Photoshop are often surprised by this behavior since Lightroom is non-destructive by default.
To crop non-destructively, uncheck the Delete Cropped Pixels box in the options bar before you apply your crop. With this option off, Photoshop hides the cropped areas instead of deleting them. The pixels remain part of the document and can be recovered at any time.
To bring those hidden pixels back after a non-destructive crop, select the Crop Tool again and click the Reveal All button in the options bar. Alternatively, go to Image > Reveal All in the top menu. The canvas expands to show the full original image again.
We recommend working non-destructively whenever possible. It gives you the freedom to experiment with different compositions without permanently losing image data. The only trade-off is slightly larger file sizes since the hidden pixels are preserved in the document.
Crop Overlays: Rule of Thirds, Golden Ratio, and More
Composition overlays help you make better creative decisions while cropping. Photoshop offers five overlay types that appear as guide lines on top of your image when the Crop Tool is active.
The Rule of Thirds overlay divides your image into a 3×3 grid. Placing key subjects at the intersection points or along the grid lines creates balanced, visually pleasing compositions. This is the default overlay and the one most photographers rely on daily.
The Golden Ratio overlay uses a spiral based on the Fibonacci sequence. It guides your eye through the image in a natural curve, and it works especially well for landscape and portrait photography. The Golden Spiral is a related overlay that draws the actual spiral shape on your image.
The remaining overlays are Grid (a dense alignment grid for precise leveling), Diagonal (diagonal lines for dynamic compositions), and Triangles (intersecting triangles for complex compositions). Press the O key on your keyboard to cycle through all overlay types while the Crop Tool is active. Press Shift+O to flip or rotate the orientation of overlays that support directional changes.
You can also set overlays to appear always, never, or only when the Crop Tool is active through the gear icon in the options bar. The Auto Show Overlay option is the most practical, as it displays guides only while you are actively cropping.
How to Crop a Single Layer Without Affecting Others
This is one of the most common questions in Photoshop forums. The Crop Tool by default affects the entire canvas and every layer in your document. If you want to crop just one layer while leaving others untouched, you need a different approach.
The cleanest method is to use a layer mask. Select the layer you want to crop, then click the Add Layer Mask button at the bottom of the Layers panel. Choose the Rectangular Marquee Tool, draw a selection over the area you want to keep, then fill the mask with black outside that selection. The masked areas become hidden without being deleted, and all other layers remain completely unaffected.
Another approach is to convert your layer to a Smart Object before cropping. Right-click the layer and select Convert to Smart Object. Then use the Crop Tool, but be aware that the standard Crop Tool still affects the full canvas. For true per-layer cropping, the layer mask method gives you the most control.
If you frequently need to crop layers independently, consider using the Frame Tool (keyboard shortcut K). The Frame Tool lets you place an image inside a rectangular frame on its own layer, and you can resize or reposition the frame without affecting other layers. It works like a clipping mask but is designed for this exact use case.
Perspective Crop Tool: Fixing Tilted Lines
The Perspective Crop Tool is a separate tool designed for correcting perspective distortion in architectural and product photography. You will find it behind the standard Crop Tool in the toolbar, accessible by clicking and holding the Crop Tool icon.
Instead of drawing a simple rectangle, you click four times to place four corner points on your image. Position each corner along the edges of the object you want to straighten, like the corners of a building or a picture frame. When you press Enter, Photoshop crops the image and warps the geometry so the object appears square and properly aligned.
This tool is powerful for real estate photography, product shots, and any scene where tilted converging lines distract from the subject. The regular Crop Tool cannot correct perspective distortion, so this is the right choice when buildings appear to lean backward or product edges look trapezoidal.
Crop Tool vs Canvas Size vs Frame Tool
Photoshop offers several tools that seem similar but serve different purposes. Understanding the differences helps you choose the right one for each situation.
The Crop Tool trims or reshapes your image by cutting away areas outside the crop border. It can also straighten and set aspect ratios. Use it when you want to remove parts of the image or change its proportions.
The Canvas Size command (Image > Canvas Size) changes the working area without altering your image content. You can use it to add space around an image, like adding a border or blank area for text. Cropping with Canvas Size by reducing dimensions will cut content, but the tool is primarily designed for resizing the workspace rather than composing the image.
The Frame Tool creates a container that holds an image. You can resize the frame independently of the image, reposition the image within the frame, and swap images between frames. It is ideal for layout work, templates, and situations where you need non-destructive per-layer cropping control.
For most photo editing tasks, the Crop Tool is the right choice. For design layouts and template work, the Frame Tool offers more flexibility. Canvas Size is best when you need to add working space rather than remove it.
Photoshop Crop Tool Keyboard Shortcuts
Learning the keyboard shortcuts for the Crop Tool speeds up your workflow dramatically. Here is a quick reference for the most useful shortcuts:
C – Select the Crop Tool
Enter (Windows) / Return (Mac) – Commit the crop
Esc – Cancel the crop
O – Cycle through composition overlays
Shift+O – Flip or rotate overlay orientation
X on the options bar – Swap width and height values (reverses aspect ratio)
Alt (Windows) / Option (Mac) + drag handle – Resize crop border from center
Shift + drag outside border – Constrain rotation to 15-degree increments
Press Ctrl+Z (Windows) or Cmd+Z (Mac) immediately after committing a crop to undo it if you made a mistake. You can also use Ctrl+Alt+Z (Windows) or Cmd+Option+Z (Mac) to step back through multiple actions.
Common Crop Problems and How to Fix Them
After years of editing in Photoshop, we have run into every crop issue imaginable. Here are the most common problems users report in forums along with their solutions.
White or gray background appears after cropping. This happens when you crop outside the original image boundaries and Delete Cropped Pixels is checked. Photoshop fills the extra area with your background color. To prevent this, uncheck Delete Cropped Pixels for non-destructive cropping, or keep your crop border within the original image edges.
Image stretches or distorts when resizing the crop border. This occurs when you have a resolution value set in the options bar and you change the crop size. Photoshop tries to resample the image to match the entered resolution, which can cause stretching. Clear the Resolution field or leave it blank to crop without resampling.
Aspect ratio locks and you cannot crop freely. An aspect ratio preset is still active in the options bar. Click the Clear button to remove the ratio constraint, then drag the handles freely.
Crop affects all layers when you only wanted to crop one. The Crop Tool always works on the full canvas. To crop a single layer, use the layer mask method described earlier in this article, or use the Frame Tool for per-layer control.
You cannot recover pixels after a destructive crop. If Delete Cropped Pixels was checked when you applied the crop, those pixels are permanently removed from the document. Your only option is to undo (Ctrl+Z) immediately or revert to a previously saved version. Going forward, always uncheck Delete Cropped Pixels to avoid this situation.
FAQs
How do I crop just an image in Photoshop?
To crop just an image, open the file in Photoshop and press C to select the Crop Tool. Drag the handles inward to frame the area you want to keep, then press Enter (Windows) or Return (Mac) to apply the crop. The Crop Tool works on the full canvas, so if you need to crop a single layer without affecting others, use a layer mask instead.
How do I cut out part of an image in Photoshop?
To cut out part of an image, use a selection tool like the Rectangular Marquee or Lasso Tool to select the area you want to remove, then press Delete to erase it. For cutting out a subject from its background, use the Object Selection Tool or Select Subject feature, then apply a layer mask to hide the background non-destructively.
How to crop a picture within a picture in Photoshop?
Place both images on separate layers in the same document. Select the top layer and add a layer mask, then use a selection tool to define the visible area of that layer. Alternatively, use the Frame Tool (K) to create a frame shape and drag the image you want to crop into that frame. The image will be clipped to the frame boundaries.
How do I crop a part of an image?
Select the Crop Tool by pressing C, then drag the corner or edge handles to define the area you want to keep. Click inside the border to reposition the image if needed, then press Enter (Windows) or Return (Mac) to apply. Everything outside the crop border is removed or hidden depending on your Delete Cropped Pixels setting.
Wrapping Up: You Now Know How to Crop an Image in Photoshop
Cropping in Photoshop comes down to four core steps: select the Crop Tool with the C key, drag the handles to frame your composition, set an aspect ratio if needed, and press Enter to apply. Once you have those fundamentals down, the rest is about refining your workflow with the features that make Photoshop stand out from simpler editors.
We covered straightening tilted horizons with Content-Aware Fill, non-destructive cropping with the Delete Cropped Pixels toggle, all five composition overlays for better creative decisions, and how to crop a single layer without affecting the rest of your document. You also learned about the Perspective Crop Tool for fixing architectural distortion and when to use the Frame Tool or Canvas Size instead of the standard Crop Tool.
Our advice for next steps: start by practicing the basic four-step crop on a few images until it becomes muscle memory. Then experiment with non-destructive cropping by unchecking Delete Cropped Pixels, and try using the Rule of Thirds overlay to improve your compositions. Those two habits alone will make a visible difference in your editing results. Every time you open an image in Photoshop, the Crop Tool is ready to help you frame it perfectly.