
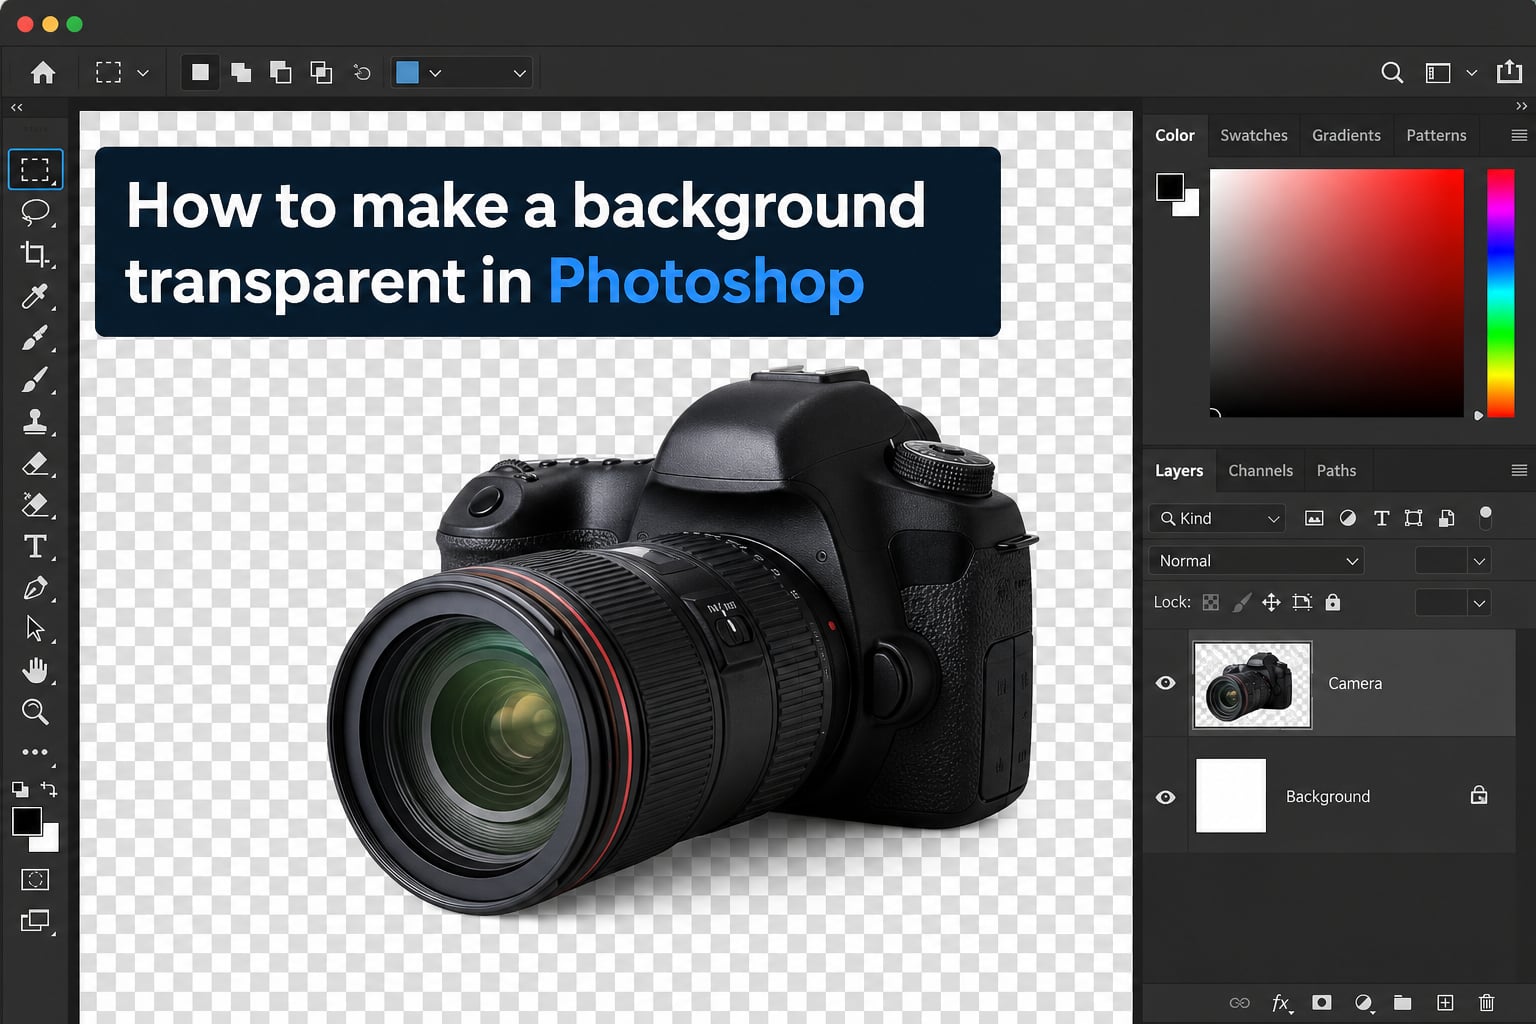
Learning how to make a background transparent in Photoshop is one of the most useful skills for anyone working with images. Whether you are designing a logo for your Etsy shop banner, creating product photos for an online store, or building graphics for social media, transparent backgrounds give you total flexibility.
I have spent years working in Photoshop across hundreds of design projects. Over that time, I have tested every background removal method Photoshop offers, from the AI-powered Remove Background button to old-school manual selection techniques. In this guide, I will walk you through the four best methods, ranked from fastest to most precise, so you can pick the right one for your image.
By the end of this article, you will know exactly which tool to use, how to refine tricky edges like hair and lace, and how to save your file so the transparency actually sticks. I will also cover the common mistakes that trip up beginners and the keyboard shortcuts that will speed up your workflow.
Table of Contents
- What Is a Transparent Background in Photoshop?
- How to Make a Background Transparent in Photoshop: 4 Methods
- Refining Edges with Select and Mask
- Saving Your Image with Transparency Preserved
- Common Mistakes and Troubleshooting
- Essential Keyboard Shortcuts for Background Removal
- FAQs
- How do I make a white background transparent in Photoshop?
- How do I remove the background of an image in Photoshop?
- Where is the transparency tool in Photoshop?
- Why does my transparent background show up as white?
- How do I save a transparent background in Photoshop?
- How do I remove complex backgrounds with hair or fur in Photoshop?
- Conclusion
What Is a Transparent Background in Photoshop?
A transparent background is an image area with no visible pixels at all. Instead of white, black, or any color filling the space behind your subject, that area is completely see-through. Whatever you place the image on top of will show through those empty pixels.
In Photoshop, transparency appears as a gray-and-white checkerboard pattern. This checkerboard is not part of your actual image. Think of it as a visual placeholder that tells you those pixels are empty. When you export the file correctly, the checkerboard disappears and only the transparent area remains.
Transparent backgrounds matter because they let you drop an image onto any surface without an ugly colored box around the subject. A logo with a transparent background sits cleanly on a website header, an email signature, or a printed T-shirt. Without transparency, you would be stuck with whatever background the original photo had.
How to Make a Background Transparent in Photoshop: 4 Methods
There are four primary ways to make a background transparent in Photoshop. Each method suits a different type of image and skill level. I will cover all four so you can match the tool to your specific project.
Here is a quick breakdown before we go deeper into each one. Method 1 uses the AI-powered Remove Background quick action and takes about five seconds. Method 2 uses the Magic Wand tool for solid color backgrounds like white. Method 3 uses the Quick Selection tool for photos with people or products. Method 4 uses the Lasso tool for manual, pixel-perfect control.
Method 1: Remove Background Quick Action (Fastest)
The Remove Background quick action is the fastest method available in Photoshop. It uses Adobe Sensei AI to automatically detect your subject and strip away everything else. In my experience, it works well on roughly 80 percent of images with clear subjects.
Step 1: Open your image in Photoshop by going to File > Open or by dragging the file into the workspace.
Step 2: If the image opens as a locked Background layer, click the lock icon in the Layers panel to unlock it. This step is essential because locked background layers cannot show transparency.
Step 3: Go to Window > Layers to make sure the Layers panel is visible. Then look for the Properties panel, which usually sits next to Layers.
Step 4: In the Properties panel, scroll down to the Quick Actions section. Click the button labeled Remove Background. Photoshop will instantly detect your subject, create a layer mask, and hide the background.
Step 5: You should now see the checkerboard pattern behind your subject. If the result looks good, you can proceed to save the file as PNG to preserve the transparency.
One thing I have noticed from testing this on dozens of images is that the AI struggles with translucent objects, lace fabric, and fine hair. For those situations, skip to Method 3 or the Refining Edges section below.
Method 2: Magic Wand Tool for Solid Color Backgrounds
The Magic Wand tool is perfect when you have a solid color background, especially white. It selects pixels based on color similarity, which makes it ideal for product shots on plain backdrops or logos on white backgrounds.
Step 1: Open your image and unlock the background layer by clicking the lock icon in the Layers panel.
Step 2: Select the Magic Wand tool from the toolbar on the left. If you do not see it, it may be nested under the Quick Selection tool. Right-click the Quick Selection icon to find it, or press Shift+W to cycle through selection tools.
Step 3: In the options bar at the top, set the Tolerance value. For a pure white background, start with a tolerance of 32. If the wand selects too much, lower the tolerance to 10 or 15. If it selects too little, raise it to 50 or higher.
4: Click on the background area you want to remove. You will see a selection outline appear around the matching pixels. Hold Shift and click again to add more areas to the selection if needed.
Step 5: Press the Delete key (or Backspace on Windows) to remove the selected background. You should now see the checkerboard pattern where the background used to be.
One common issue I see is the Magic Wand leaving a thin halo of color around the subject edge. To fix this, go to Select > Modify > Contract and enter 1 or 2 pixels before pressing Delete. This pulls the selection inward slightly so no background residue remains.
Method 3: Quick Selection Tool for Complex Subjects
The Quick Selection tool gives you more control over images with people, products, or any subject that has irregular edges. It works like a smart brush that automatically snaps to edges as you paint over an area.
Step 1: Open your image and unlock the background layer.
Step 2: Select the Quick Selection tool from the toolbar. Press Shift+W if the Magic Wand is currently active. Alternatively, you can use the Select Subject button in the options bar for a one-click starting point.
Step 3: Adjust your brush size using the bracket keys. Press the left bracket to shrink the brush and the right bracket to enlarge it. A smaller brush gives you better control around fine details.
Step 4: Paint over your subject. The tool will expand the selection automatically as it detects edges. If it grabs too much background, hold Alt (Option on Mac) and paint over the area to remove it from the selection.
Step 5: Once your subject is fully selected, you have two options. You can press Ctrl+J (Cmd+J on Mac) to copy the subject to a new layer, then hide or delete the original background layer. Alternatively, invert the selection with Ctrl+Shift+I and press Delete to remove the background directly.
I recommend the layer copy approach because it is non-destructive. If you make a mistake, you still have the original image underneath. You can always come back and refine the selection without starting over.
Method 4: Lasso Tool for Manual Precision
The Lasso tool gives you total manual control over your selection. It is the slowest method but the most precise, making it ideal for images where automated tools fail. I use it as a cleanup tool after trying Methods 1 through 3.
Photoshop offers three lasso variants. The standard Lasso lets you draw a freehand selection. The Polygonal Lasso creates selections from straight line segments, which is great for geometric shapes. The Magnetic Lasso snaps to edges automatically as you trace along a subject.
Step 1: Open your image, unlock the background layer, and select the Lasso tool from the toolbar. Right-click to choose Polygonal or Magnetic if either suits your subject better.
Step 2: Carefully trace around the subject you want to keep. With the standard Lasso, draw a closed loop around the subject and release the mouse when you reach your starting point. With the Polygonal Lasso, click point by point around the subject, then close the loop by clicking your first point.
Step 3: Once your subject is selected, invert the selection with Shift+Ctrl+I (Shift+Cmd+I on Mac) so the background is selected instead.
Step 4: Press Delete to remove the background. You can also use Select and Mask at this point to refine the edge before finalizing.
The Magnetic Lasso is particularly useful for subjects with clear but irregular outlines, like a product with angled edges. It takes practice, but once you get comfortable with it, you can trace complex shapes in under a minute.
Refining Edges with Select and Mask
No matter which selection method you use, edge refinement is what separates amateur results from professional ones. Photoshop includes a dedicated workspace called Select and Mask (formerly Refine Edge) that handles this step. If you are working with hair, fur, lace, or any subject with fine detail, this section is essential.
To access Select and Mask, make any selection in your image, then click the Select and Mask button in the options bar. You can also find it under Select > Select and Mask, or press Ctrl+Alt+R (Cmd+Option+R on Mac).
Once inside the workspace, you will see several tools along the right side. The most important for transparency work is the Refine Edge Brush. Paint this brush over areas with hair, fur, or soft edges. Photoshop will detect the fine strands and adjust the selection boundary to include them.
Under the Global Refinements section, I typically set Smooth to 2 or 3 to remove jagged edges. Feather is set to 0.5 or 1 pixel for a natural transition. Contrast gets bumped to 10 to 15 percent to sharpen the edge. Shift Edge I usually leave at zero, or set to negative 5 percent if there is a visible halo.
For stubborn color halos around your subject, scroll to the Output Settings at the bottom of the panel. Check the Decontaminate Colors box and set the amount to 100 percent. This replaces edge pixels that still contain background color with colors sampled from your subject. Reddit users swear by this trick for difficult images.
When you are satisfied with the result, set the Output To dropdown to Layer Mask and click OK. Photoshop applies the refined selection as a non-destructive mask, so you can always come back and adjust it later.
Saving Your Image with Transparency Preserved
This is where many beginners lose their transparency. If you save the file as a JPG, the transparent area fills with white and your work is lost. JPG does not support transparency at all. You must use a format that supports alpha channel transparency.
PNG is the most widely compatible format for transparent images. It supports full alpha channel transparency, works in all browsers, and is the standard for web graphics, logos, and product images. For Photoshop projects you want to revisit later, save a PSD copy as well since PSD preserves all layers, masks, and transparency.
To save your image as a transparent PNG, go to File > Export > Export As. Select PNG from the format dropdown. Make sure the Transparency checkbox is checked. Set the image quality to maximum. Click Export and choose a save location.
If you are working with the Save As dialog instead, go to File > Save As, select PNG from the format list, and save. In newer Photoshop versions, Save As PNG preserves transparency automatically.
Other formats worth knowing are GIF, which supports transparency but only at 1-bit depth (a pixel is either fully transparent or fully opaque), and WebP, which supports transparency with smaller file sizes. For most users in 2026, PNG remains the safest and most versatile choice.
One tip I always share: keep your PSD file. Once you close Photoshop, that PNG is locked in. If you need to adjust the edge or fix a mistake later, having the PSD with all layers intact saves you from starting over completely.
Common Mistakes and Troubleshooting
After helping countless people troubleshoot their Photoshop transparency issues, I see the same problems come up again and again. Here are the most common mistakes and how to fix them, drawn directly from real user reports on Reddit, Stack Exchange, and Adobe community forums.
Problem: Your transparent background turns white after saving. This happens because you saved as JPG instead of PNG. JPG cannot store transparency. Always use PNG or PSD for transparent images. If you already saved as JPG, reopen your PSD file and re-export as PNG.
Problem: You cannot edit the background layer. The background layer is locked by default. Click the small lock icon next to the layer name in the Layers panel to unlock it. Once unlocked, the layer becomes a normal layer and you can delete, mask, or modify it freely.
Problem: The checkerboard pattern shows up in your final exported image. It will not. The checkerboard is only a Photoshop visualization tool. As long as you export as PNG with transparency enabled, the checkerboard stays behind in Photoshop and the actual transparent area exports correctly.
Problem: The Magic Wand selects too much or too little of the background. This is a tolerance issue. Lower the tolerance to select fewer similar pixels, or raise it to select more. You can also check the Contiguous box in the options bar to limit selection to connected pixels, which prevents the wand from selecting matching colors inside your subject.
Problem: Edges look jagged or rough after removing the background. Use Select and Mask to smooth the edge. Set Smooth to 2 or 3 and Feather to 0.5 pixels. For really rough edges, try the Refine Edge Brush on the problem areas.
Problem: The Remove Background tool struggles with hair, lace, or glass. AI background removal has limits with translucent and fine-detail subjects. For these cases, use the Quick Selection tool to get a base selection, then refine with Select and Mask and the Decontaminate Colors option at 100 percent.
Problem: Your image mode is set to Indexed Color. Some GIF files open in Indexed Color mode, which limits your editing options. Go to Image > Mode > RGB Color before attempting any background removal. RGB mode gives you access to the full range of selection tools and layer features.
Problem: You drew on the wrong layer and cannot make it transparent. Always check which layer is active in the Layers panel before making edits. The active layer is highlighted. If you accidentally drew on the background layer, undo with Ctrl+Z, create a new layer, and try again.
Essential Keyboard Shortcuts for Background Removal
Keyboard shortcuts dramatically speed up your background removal workflow. I use these constantly, and they cut my editing time in half on most projects. Memorize these and your Photoshop sessions will feel much smoother.
Unlock background layer: Click the lock icon, or double-click the Background layer and press Enter.
Cycle selection tools: Press Shift+W to toggle between the Magic Wand and Quick Selection tools.
Quick Selection brush size: Use the left bracket to shrink and the right bracket to enlarge the brush.
Add to selection: Hold Shift while selecting with any tool.
Subtract from selection: Hold Alt (Option on Mac) while selecting.
Invert selection: Press Ctrl+Shift+I (Cmd+Shift+I on Mac) to swap the selected and unselected areas.
Deselect: Press Ctrl+D (Cmd+D on Mac) to remove the current selection.
Open Select and Mask: Press Ctrl+Alt+R (Cmd+Option+R on Mac) with an active selection.
Copy selection to new layer: Press Ctrl+J (Cmd+J on Mac) to duplicate the selected area on its own layer.
Undo: Press Ctrl+Z (Cmd+Z on Mac) to undo your last action. Press repeatedly to step backward through your history.
For anyone working on transparent backgrounds for their LinkedIn company page cover photo or Instagram profile picture, these shortcuts will save you significant time across batches of images.
FAQs
How do I make a white background transparent in Photoshop?
To make a white background transparent, unlock the background layer, select the Magic Wand tool, set tolerance to 32, click on the white background, and press Delete. If the wand selects too much white inside your subject, lower the tolerance or uncheck Contiguous. Save the result as PNG to preserve transparency.
How do I remove the background of an image in Photoshop?
The fastest way to remove a background is to open the Properties panel and click the Remove Background quick action. This uses Adobe Sensei AI to detect your subject and create a layer mask automatically. For more control, use the Quick Selection tool or Magic Wand for manual selection.
Where is the transparency tool in Photoshop?
Photoshop does not have a single transparency tool. Transparency is achieved by removing background pixels using selection tools like Magic Wand, Quick Selection, or the Remove Background quick action in the Properties panel. The checkerboard pattern in the Layers panel indicates which areas are transparent.
Why does my transparent background show up as white?
Your transparent background appears white because the file was saved as JPG, which does not support transparency. Reopen your PSD file and export as PNG with the Transparency checkbox enabled. Always use PNG or PSD formats when working with transparent backgrounds.
How do I save a transparent background in Photoshop?
Go to File u0026gt; Export u0026gt; Export As, select PNG from the format dropdown, and make sure Transparency is checked. Click Export and choose a save location. PNG preserves full alpha channel transparency, unlike JPG which fills transparent areas with white.
How do I remove complex backgrounds with hair or fur in Photoshop?
Use the Quick Selection tool for a base selection, then open Select and Mask with Ctrl+Alt+R. Use the Refine Edge Brush over hair and fur areas, set Decontaminate Colors to 100 percent, and output as a Layer Mask. This handles fine detail better than the AI Remove Background tool.
Conclusion
Knowing how to make a background transparent in Photoshop opens up a world of creative flexibility. Start with the Remove Background quick action for speed, switch to the Magic Wand for solid color backgrounds, use Quick Selection for complex subjects, and rely on the Lasso tool for manual precision when nothing else works.
Always finish with Select and Mask for edge refinement, and save as PNG to keep your transparency intact. Keep a PSD backup so you can revisit the project anytime. With these methods and the troubleshooting tips above, you can handle virtually any background removal challenge that comes your way in 2026.
For more guidance on preparing your transparent images for specific platforms, check our resources on LinkedIn profile picture dimensions and other image sizing guides across the site.