
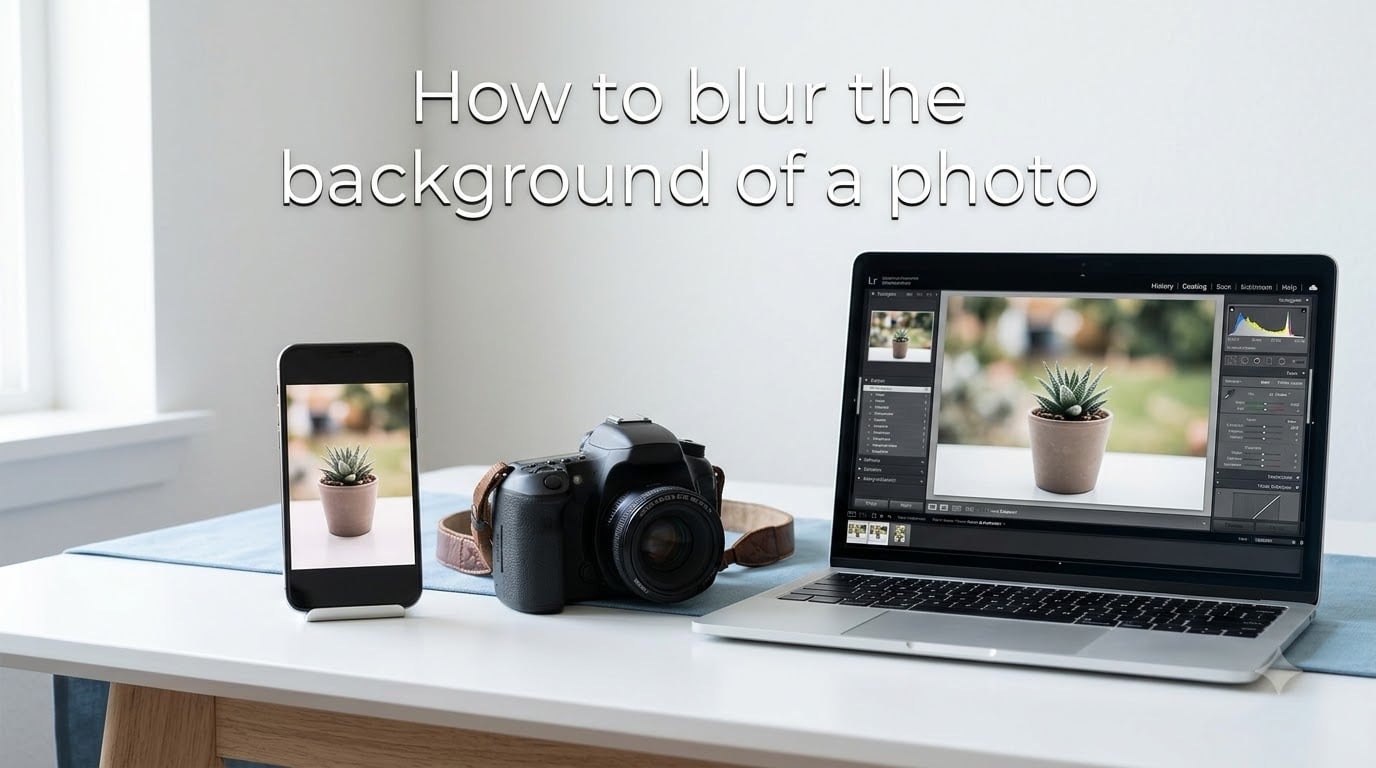
Blurring the background of a photo is one of the fastest ways to make your subject pop and give your images a professional, polished look. Whether you are shooting portraits on your phone, editing product photos for an online store, or trying to salvage a selfie with a messy background, there are multiple ways to achieve that buttery smooth background blur.
In this guide, I will walk you through every method I have tested, from in-camera Portrait mode on iPhone and Android to free online tools, mobile editing apps, Photoshop, and full DSLR camera settings. By the end, you will know exactly how to blur the background of a photo regardless of what device you own or what software you prefer.
One thing I learned after editing hundreds of photos: there is no single “best” way to blur a background. The right method depends on whether you are taking the photo right now or working with one you already shot. It also depends on your skill level and how natural you want the result to look. So I broke this guide down by method, device, and use case so you can jump straight to what works for you.
Before we get into the step-by-step instructions, let me quickly cover what background blur actually is and why it matters. Understanding the basics will help you pick the right approach and avoid the common mistakes that make edited photos look fake.
Table of Contents
- Why Blur the Background of a Photo?
- Method 1: Use Portrait Mode on iPhone or Android (In-Camera)
- Method 2: Blur the Background of an Existing Photo Using Free Online Tools
- Method 3: Blur the Background on Your Phone With Editing Apps
- Method 4: Blur a Photo Background in Photoshop
- Method 5: Get Background Blur With a DSLR or Mirrorless Camera
- How to Adjust Blur Intensity for Natural-Looking Results
- Common Mistakes to Avoid When Blurring Photo Backgrounds
- How to Blur the Background on CapCut and Instagram
- Frequently Asked Questions
- Conclusion: Choosing the Right Method to Blur Your Photo Background
Why Blur the Background of a Photo?
Background blur, often called bokeh in photography circles, is the visual effect where everything behind your main subject appears softly out of focus. The subject stays sharp and detailed while the background melts into a smooth wash of color and light. This creates a clear separation between the subject and everything around it.
People blur photo backgrounds for a wide range of reasons. Here are the most common use cases I see over and over:
- Portrait photography: Drawing the viewer’s eye directly to the person’s face by removing background distractions.
- Product photos: Making an item stand out against a clean, defocused backdrop for e-commerce listings or social media posts.
- Headshots and profile pictures: Giving LinkedIn, dating app, or website headshots a professional studio feel.
- Social media content: Creating scroll-stopping Instagram posts and stories with a dreamy, shallow depth of field look.
- Salvaging photos with busy backgrounds: Rescuing a great shot where the background is cluttered, messy, or distracting.
I have used background blur in every one of these scenarios. When I shot product photos for a friend’s Etsy shop, blurring the kitchen counter behind each item instantly made the photos look like they came from a professional studio. The same trick works for selfies, pet photos, food shots, and family pictures.
The bottom line: blurring the background adds depth, directs attention, and elevates the perceived quality of almost any photo. Now let me show you five different ways to do it.
Method 1: Use Portrait Mode on iPhone or Android (In-Camera)
The easiest way to blur the background of a photo is to do it while you are taking the shot. Modern smartphones have built-in Portrait modes that simulate the shallow depth of field you would normally get from an expensive camera lens. This is the method I recommend for anyone who has not yet taken the photo.
How to Blur the Background on iPhone Using Portrait Mode
If you have an iPhone 8 Plus, iPhone X, or any newer model, you have access to Portrait mode. This is Apple’s built-in tool for creating background blur, and it works remarkably well for a phone camera. Here is how to use it:
Step 1: Open the Camera app and swipe to Portrait mode in the slider at the bottom of the screen.
Step 2: Frame your subject. The camera will prompt you to move closer or farther away if you are not at the right distance. You typically need to be 2 to 8 feet from your subject.
Step 3: Wait for the depth effect indicator (a yellow depth icon) to appear at the top of the screen. This tells you the blur effect is active and ready.
Step 4: Tap the shutter button to take your photo. The background will be automatically blurred.
Step 5: After capturing, you can open the photo and tap Edit to adjust the blur intensity using the depth slider (the f-stop icon). This lets you make the blur stronger or softer.
How to Blur the Background on Android Phones
Android phones offer similar features, though the exact name varies by manufacturer. Samsung calls it Live Focus, Google Pixel has Portrait mode, and other brands use terms like Bokeh or Background Blur. The steps are nearly identical across all of them:
Step 1: Open your camera app and look for Portrait, Live Focus, or Aperture mode in the shooting mode menu.
Step 2: Position your subject within the recommended distance range shown on screen.
Step 3: Some Android phones let you adjust the blur level before you shoot using a slider. If yours does, set it to your preferred intensity.
Step 4: Take the photo, then open it in your gallery and tap Edit to fine-tune the blur strength after the fact.
I have found that Portrait mode works best with a single subject, good lighting, and a background that is at least a few feet behind your subject. If your subject has fine details like flyaway hair or wispy fur, the edges can sometimes look slightly off, which I will address in the mistakes section later.
Method 2: Blur the Background of an Existing Photo Using Free Online Tools
What if you already took the photo and did not use Portrait mode? This is the most common question I see in forums. The good news is that several free online tools use AI to detect your subject and blur everything behind it automatically. You do not need to install anything or even create an account for some of them.
Canva: One-Click Auto Focus Blur
Canva is one of the most popular free photo editors online, and it has a built-in Auto Focus feature that blurs backgrounds in seconds. Here is how I use it:
Step 1: Go to canva.com, upload your photo, and open it in the editor.
Step 2: Click Edit Photo at the top of the screen and select Auto Focus from the menu.
Step 3: Canva’s AI automatically detects your subject and blurs the background. Use the intensity slider to control how strong the blur looks.
Step 4: If you want more control, go to the Adjust tab, choose Background under Select Area, and fine-tune the blur manually.
Step 5: Download your edited photo and you are done.
Magic Studio: AI Background Blur in Four Steps
Magic Studio offers a dedicated background blur tool that requires no signup. I like it for quick edits when I do not want to create an account. The process is simple:
Step 1: Go to magicstudio.com/backgroundblur and upload or drag and drop your image.
Step 2: The AI automatically selects the foreground subject and separates it from the background.
Step 3: Adjust the blur intensity using the slider until the background looks right.
Step 4: Download the finished image.
remove.bg: Blur Effect After Background Removal
remove.bg takes a slightly different approach. It removes the background entirely first, then lets you add it back with a blur effect applied. This gives you very clean edges around your subject:
Step 1: Upload your image to remove.bg.
Step 2: Click Effects and choose Blur Background.
Step 3: Drag the slider to control how much blur is applied to the background.
Step 4: Download the result.
Adobe Express: Free Online Blur Tool
Adobe Express offers a free blur background tool that works similarly to the others. Upload your image, let the tool separate the subject from the background, apply the blur effect, and download. Adobe’s subject detection tends to be very accurate, which means cleaner edges and fewer manual touch-ups.
One privacy tip I always share: if your photo contains sensitive information, think twice before uploading it to any online editor. Use a trusted, well-known tool, and avoid uploading images you would not want anyone else to potentially see.
Method 3: Blur the Background on Your Phone With Editing Apps
Mobile editing apps give you more control than one-click online tools, and they work great for blurring backgrounds of photos already in your camera roll. I have tested several of these apps, and these three consistently deliver the best results.
Picsart: Full-Featured Blur Editor
Picsart is available on iOS, Android, and web. It is one of the most feature-rich free photo editors available, and its blur tools are excellent. Here is how to blur the background of a photo in Picsart:
Step 1: Open Picsart and tap Start Editing, then select your photo from the gallery.
Step 2: Scroll the bottom toolbar and tap Blur.
Step 3: Choose between Smart selection (AI detects the subject automatically) or Manual selection (you paint the blur area with your finger).
Step 4: If using Smart selection, refine the mask by erasing or adding areas with the brush tool. Use the feathering option to soften edges.
Step 5: Adjust the blur intensity slider and tap Apply when you are happy with the result.
Picsart also lets you add creative effects like bokeh light shapes, vignettes, and motion blur on top of the basic background blur.
AfterFocus: Precision Selective Focus
AfterFocus is a dedicated blur app that many iPhone photographers recommend for one reason: it gives you excellent manual control over what stays sharp and what gets blurred. Here is the workflow:
Step 1: Open AfterFocus and select a photo from your gallery.
Step 2: Use the Smart brush to roughly paint over your subject. The app tries to detect edges automatically.
Step 3: Switch to the Background brush and paint over the area you want blurred.
Step 4: Tap the blur icon and adjust the strength. AfterFocus offers both lens blur (round, natural bokeh) and motion blur effects.
Step 5: Use the Feathering tool to smooth the transition between sharp and blurred areas for a more realistic result.
I found AfterFocus especially good for photos with complex edges, like a person standing in front of a fence or a pet with fur. The manual brushes let you fix spots where auto-selection fails.
Snapseed: Google’s Free Lens Blur Tool
Snapseed is Google’s free photo editing app for iOS and Android. It has a dedicated Lens Blur tool that simulates a real camera lens aperture. Here is how to use it:
Step 1: Open Snapseed and load your photo.
Step 2: Tap Tools and select Lens Blur.
Step 3: A circle appears on your photo. Drag it to position the in-focus point on your subject. Pinch to resize the focus area.
Step 4: Swipe vertically to adjust blur strength, transition, and vignette strength.
Step 5: Tap the checkmark to apply, then export your photo.
Snapseed’s Lens Blur creates a nice circular bokeh effect that looks more like a real camera than a simple Gaussian blur. I like pairing it with a subtle vignette for a dreamy portrait look.
Method 4: Blur a Photo Background in Photoshop
Photoshop gives you the most precise control over background blur of any tool on this list. If you have access to Photoshop and want professional-grade results, this is the method to use. The process involves three main steps: selecting your subject, applying the blur, and refining the edges.
Step-by-Step Photoshop Background Blur
Step 1: Open your photo in Photoshop. Press Ctrl+J (or Cmd+J on Mac) to duplicate the background layer. Always work on a copy so you can undo changes.
Step 2: Go to Select > Subject. Photoshop’s AI automatically detects and selects the main subject in your photo. This works surprisingly well for most images.
Step 3: Refine the selection if needed. Go to Select > Select and Mask and use the Refine Edge brush to clean up areas around hair, fur, or complex edges. Adjust the Feather slider to soften the selection boundary.
Step 4: Invert the selection by pressing Ctrl+Shift+I (or Shift+Cmd+I on Mac). Now the background is selected instead of the subject.
Step 5: Go to Filter > Blur Gallery > Iris Blur or Field Blur. Iris Blur creates a natural circular depth-of-field effect. Field Blur gives you more control over where the blur is strongest.
Step 6: Adjust the blur amount using the on-image controls or the slider in the panel. Preview the effect at 100% zoom to check edges.
Step 7: Click OK to apply the blur, then save your image.
For even more realistic results, try the Lens Blur filter instead of Gaussian Blur. Lens Blur simulates how a real camera lens renders out-of-focus areas, producing circular bokeh highlights rather than a flat, uniform blur. The difference is subtle but noticeable in professional work.
Method 5: Get Background Blur With a DSLR or Mirrorless Camera
If you own a DSLR or mirrorless camera, you can achieve background blur naturally at the time of shooting without any editing at all. This is how professional photographers create those gorgeous, creamy backgrounds. It all comes down to controlling five key factors.
Factor 1: Aperture (F-Stop)
Aperture is the single most important setting for background blur. The aperture is the opening in your lens that controls how much light reaches the sensor. It is measured in f-stops, and here is the key rule: lower f-stop numbers create more background blur.
For maximum blur, set your aperture to the lowest number your lens allows. A lens that opens to f/1.4, f/1.8, or f/2.8 will produce beautiful, shallow depth of field with a softly blurred background. Kit lenses that only open to f/3.5 or f/5.6 will produce noticeably less blur.
Factor 2: Focal Length
Longer focal lengths compress the background and increase blur. A 50mm lens will blur the background more than a 24mm lens at the same aperture. A 85mm or 135mm telephoto lens will blur it even more. This is why portrait photographers love 85mm and 135mm lenses.
If you want more background blur without buying a new lens, zoom in as far as your lens allows and step back to maintain framing. The longer focal length will naturally increase the blur.
Factor 3: Distance Between Camera and Subject
The closer you are to your subject, the more the background blurs. This is because getting closer reduces the depth of field. So move in tight, fill the frame with your subject, and watch the background melt away.
Factor 4: Distance Between Subject and Background
This one surprises a lot of beginners. The farther your subject is from the background, the more the background will blur. If your subject is standing right against a wall, no amount of aperture adjustment will blur that wall. Move your subject several feet away from any background elements, and the blur becomes much more pronounced.
Factor 5: Sensor Size
Larger sensors produce more background blur at the same aperture and framing. A full-frame camera will blur the background more than a crop-sensor (APS-C) camera, which in turn blurs more than a phone sensor. This is why you cannot replicate DSLR-level bokeh on a phone without computational tricks like Portrait mode.
Here is my quick reference checklist for DSLR background blur: use a low f-stop (f/1.4 to f/2.8), a longer focal length (50mm or more), get close to your subject, and keep the background far behind them. Combine all four and you will get that professional, creamy bokeh.
How to Adjust Blur Intensity for Natural-Looking Results
Whether you are using an app, an online tool, or Photoshop, the difference between a natural-looking blur and an obviously fake one usually comes down to intensity and edge quality. I see over-blurred photos constantly on social media, and they always look unnatural.
The golden rule: less is more. A real camera lens produces a gradual transition from sharp to blurry. If your edited photo has a harsh line where sharpness suddenly drops off, viewers will instantly notice something is wrong. Aim for a gentle, feathered transition.
Most editing tools offer a feathering or edge softening option. Always use it. Feathering blends the boundary between the sharp subject and the blurred background, mimicking how a real lens renders depth of field. A feather radius of 5 to 15 pixels usually works well for portraits.
For blur strength, I recommend starting at around 30 to 50 percent of maximum and previewing at full size. You can always add more blur, but if you overdo it, the photo starts to look like a cardboard cutout was pasted onto a blurry backdrop. When in doubt, dial it back.
Common Mistakes to Avoid When Blurring Photo Backgrounds
After reading through hundreds of forum posts and app reviews, I noticed the same complaints coming up again and again. Here are the most common mistakes people make when blurring photo backgrounds, and how to avoid each one.
Ragged or Blurry Edges on the Subject
This is the number one complaint I see. One user reported using an auto cutout tool and finding that “items end up with ragged edges and are often blurry after I edit them.” Auto-selection tools are not perfect, especially around hair, fur, and translucent objects.
How to fix it: After running auto-selection, zoom in to 100 percent and manually clean up the edges with a brush tool. Use feathering to soften the transition. Apps like AfterFocus and Picsart give you manual refinement tools specifically for this purpose.
Over-Blurring the Background
When you crank the blur slider to maximum, the background turns into an unrecognizable smear. Real camera blur is softer and more gradual. If the background looks like a flat colored wall, you went too far.
How to fix it: Reduce the blur intensity so some background shapes are still faintly visible. This preserves a sense of place and depth while still keeping the focus on your subject.
Harsh Halos Around the Subject
A visible bright outline around your subject is a dead giveaway that the background was edited. This happens when the blur effect bleeds onto the subject’s edges during auto-selection.
How to fix it: Refine the selection mask so the blur only applies to the background. In Photoshop, use the Select and Mask workspace. In mobile apps, erase the blur from the subject’s edge with a fine brush.
Ignoring Fine Details Like Hair
Auto-selection tools often struggle with strands of hair, wisps of fur, or semi-transparent objects like glasses. If these get blurred along with the background, the result looks unnatural.
How to fix it: Use tools with AI-based hair detection (like Photoshop’s Select Subject or remove.bg’s edge refinement). For stubborn cases, switch to manual masking and paint the subject selection at high zoom.
Choosing the Wrong Tool for the Job
Using a simple slider-based blur tool for a photo with complex subject edges will always look worse than using a tool with proper subject detection. Match the tool to the complexity of your image. Simple backgrounds work fine with one-click tools. Complex scenes need manual masking.
How to Blur the Background on CapCut and Instagram
Two of the most searched queries in this space are how to blur backgrounds on CapCut and Instagram. When I checked the top-ranking pages, not a single competitor covered these methods. So let me fill that gap.
Blurring the Background in CapCut
CapCut is a free video editing app from the makers of TikTok, but it also works for photos. Many creators use it to blur backgrounds for video content and social media posts. Here is how:
Step 1: Open CapCut and start a new project. Import your photo or video clip.
Step 2: Tap on your clip in the timeline, then scroll the bottom toolbar and select Effects.
Step 3: Go to Body Effects or Video Effects and look for a blur or bokeh effect. CapCut offers several blur overlays.
Step 4: For more control, duplicate your clip. Apply blur to the bottom layer and use the Remove Background or Cutout tool on the top layer so only your subject stays sharp over the blurred background.
Step 5: Adjust the blur intensity and export your project.
Blurring the Background on Instagram
Instagram does not have a dedicated background blur tool in its main photo editor, but there are a few workarounds. The easiest approach is to use Portrait mode when capturing the photo on your phone before posting. If you already have a regular photo, you can blur it in a separate app first, then post it to Instagram.
If you want to blur the background within Instagram itself, here are your options:
In Stories: Instagram Stories does not have a blur effect in its sticker or effect library that selectively blurs backgrounds. The best approach is to edit the photo in Snapseed or Picsart first, then upload the blurred version to your story.
In Reels: You can apply blur effects from the Effects gallery when shooting Reels. Some third-party effect filters create a depth-of-field look, though results vary widely.
In Posts: Edit your photo in a dedicated app before uploading. Apply background blur in Snapseed, AfterFocus, or Picsart, save the result, then post to Instagram as normal.
My recommendation: always blur in a dedicated editing app before posting to Instagram. You get much better control and cleaner results than trying to do it within Instagram’s built-in tools.
Frequently Asked Questions
How can I blur the background of an existing photo?
You can blur the background of an existing photo using free online tools like Canva (Auto Focus feature), Magic Studio, remove.bg, or Adobe Express. Upload your photo, let the AI detect your subject, adjust the blur intensity, and download the result. You can also use mobile apps like Picsart, AfterFocus, or Snapseed for more manual control.
How do I blur the background of a photo on iPhone?
Open the Camera app, swipe to Portrait mode, position your subject 2 to 8 feet away, wait for the yellow depth icon to appear, and take the photo. For photos already taken, open the photo, tap Edit, and use the depth slider (f-stop icon) to add or adjust background blur.
How do I blur the background of an image on my phone?
On iPhone, use Portrait mode in the Camera app or edit existing photos with the depth slider. On Android, use Live Focus (Samsung), Portrait mode (Pixel), or the background blur option in your camera app. For existing photos, install a free editing app like Picsart, AfterFocus, or Snapseed and use their blur tools.
Is there a blurring tool on iPhone?
Yes. iPhone has a built-in Portrait mode in the Camera app that blurs the background while shooting. For photos already taken in Portrait mode, you can adjust blur intensity using the depth slider in the Edit menu. For regular photos, you will need a third-party app like Snapseed, Picsart, or AfterFocus.
What is the best free app to blur the background of a photo?
Snapseed is completely free with no ads and offers a great Lens Blur tool. Picsart is free with optional premium features and provides both AI and manual blur selection. AfterFocus offers excellent manual control for complex edges. All three are available on iOS and Android.
Can I blur a background without portrait mode?
Yes. If your phone does not have Portrait mode or you forgot to use it, you can blur the background after the fact using editing apps (Snapseed, Picsart, AfterFocus), free online tools (Canva, Magic Studio, remove.bg), or desktop software like Photoshop. These tools use AI subject detection or manual masking to separate your subject from the background and apply blur selectively.
Conclusion: Choosing the Right Method to Blur Your Photo Background
Learning how to blur the background of a photo opens up a world of creative possibilities. The method you choose depends on your situation: use Portrait mode if you are taking a new photo on your phone, grab a free online tool like Canva or Magic Studio for quick edits on existing photos, use mobile apps like Snapseed or Picsart for more control, turn to Photoshop for professional precision, or shoot with a DSLR using a wide aperture for the most natural bokeh.
Start simple and work your way up. For most people, Portrait mode on their phone plus a free editing app covers 90 percent of situations. The key is to keep blur intensity moderate, feather your edges, and refine your subject selection so the result looks natural. Grab a photo from your camera roll right now and try one of these methods. You will be surprised how much a little background blur can transform an ordinary shot into something that looks professionally shot.